Freestyle 101 for Snowboarders: A Beginner’s Guide to Park Riding
Freestyle riding is the epitome of snowboarding’s cultural roots. Its evolution stems from the rebellious, counter-culture skate park communities of urban landscapes. Think boxes, rails, even jumps–build all those features on snow and place them within a ski area, and they become even bigger.
At first glance, freestyle (a.k.a, park riding) might seem intimidating. Where and how does one even begin? If you’re like me, a late bloomer with no skateboard upbringing, you might prefer learning a technical skill in a series of approachable, evolutionary steps. I began freestyle at age 30. Now 33 years old, I’m certified to teach it to students at its introductory level. Curious about what freestyle has to offer? Read on for some intro tricks, tips, and practices. It’s never too late to learn something new.
Okay, time to get into coach mode!
What to Expect
Like any worthwhile skill, freestyle is definitely not an overnight process. If it were easy, everyone would be doing it. Learning tricks takes time and repetition. Trust the process and be patient with yourself as you practice. Know when you’ve gotten your share for the day to come back for more next time. Realistically, you should be comfortable riding intermediate all-mountain slopes (hard blue terrain, easy black) as a prerequisite. You’ll need to already be comfortable connecting turns sufficiently and knowing when to make emergency stops if necessary.
Entering the terrain park for the first time can feel overwhelming. This is completely normal. It’s a new environment with its own unique subculture. At first, it may seem like all eyes are on you before taking a turn. I know the feeling, I’ve been there. Recognize that although it may appear like you’re in the spotlight momentarily, more often than not people are usually focused on themselves and their own practice, rather than on what you’re doing. Just to help put your mind at ease.
What You’ll Need
In addition to your snowboard setup, having a helmet is a must. Even the most seasoned park riders can sometimes make mistakes. And falling is actually part of the learning process (if we are willing to fall, we get better each time). So it’s important that your head is covered–literally.
Optional here, but investing in snowboard-specific kneepads, wrist guards, and padded impact shorts is (in my opinion) a true game changer. Now that I’m in my 30s, I would much rather be cushioned with protective gear than nothing at all. This could easily be a self-induced placebo, but using padding encourages me to take more chances with learning new tricks. Each piece can easily fit over my base layers, while simultaneously remaining hidden underneath my top layers–nobody will ever know. My preferred go-to for all these padded items is Burton Snowboards. But you can find alternative brands as well.
Lastly, keep in mind that the type of snowboard you use will partially determine your freestyle performance. Most park riders gravitate towards symmetrical twin-tip board profiles, making it easier to land and ride out switch. On a scale of 1 to 10, freestyle snowboards feature anywhere from a soft to medium flex rating (1 being the softest, 5 being the midway point and stiffer). A softer flex profile offers more forgiving maneuverability for ground tricks, presses, and jibbing metal features. Whereas a moderate flex profile is ideal for all-around stability, especially for jumps. And some snowboard designs can offer combined stability and maneuverability. To each their own.

For further details on finding the board that works best for you, the Snowboarding Profiles Guide is a great reference to check out.
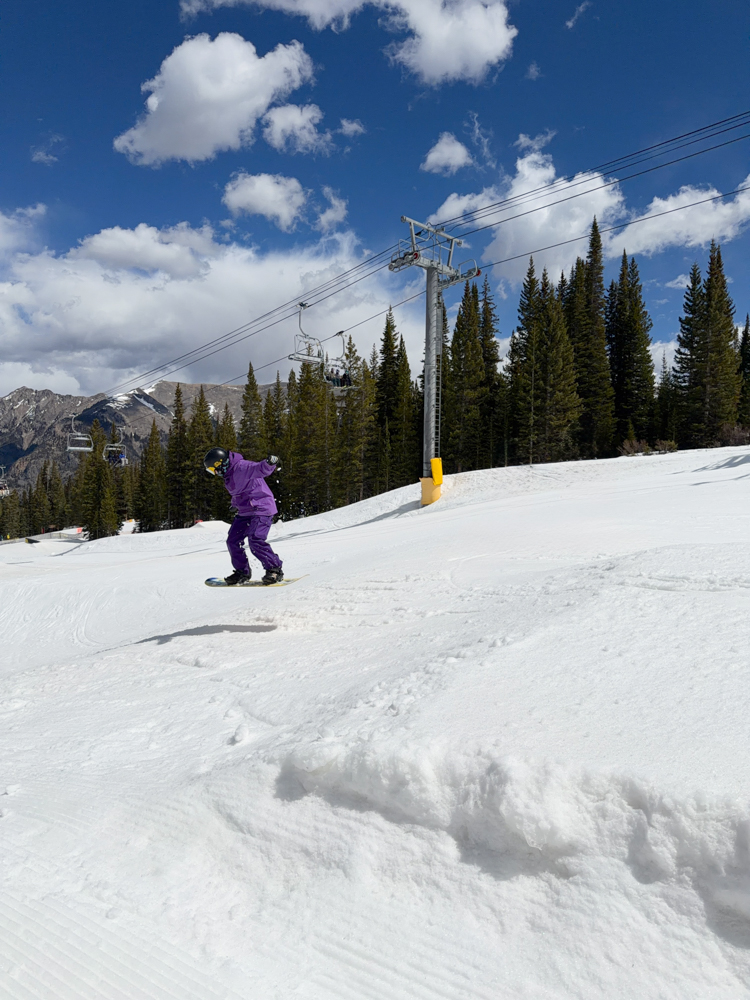
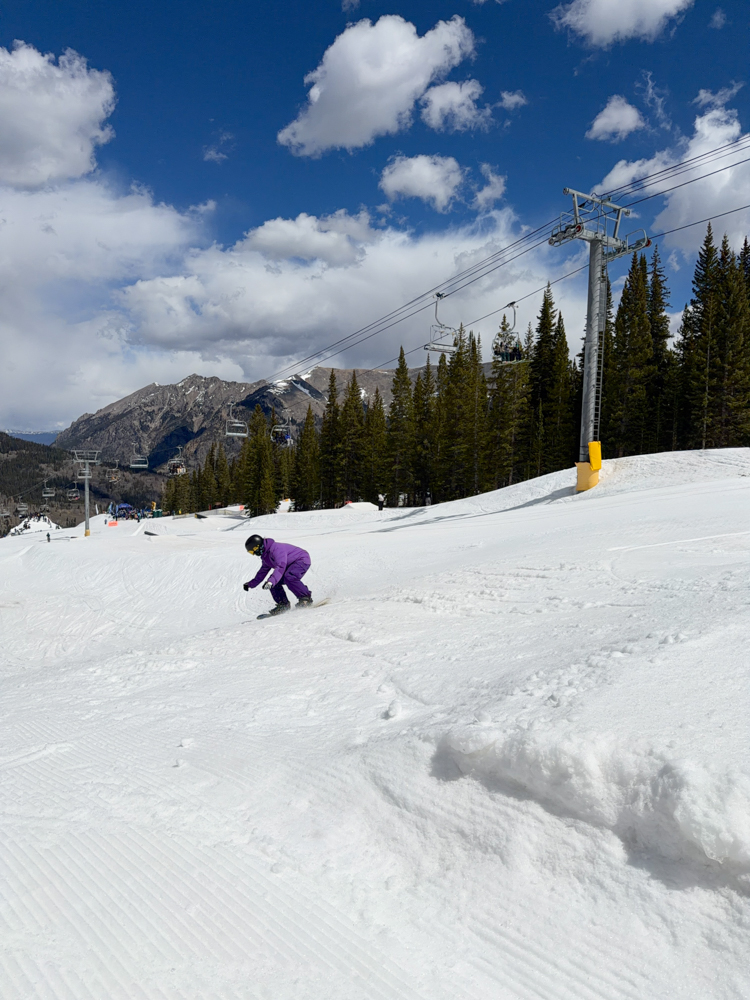
Park Etiquette and First Run – Get to Know the Features
At the park’s entrance, you’ll notice an orange sign that reads PARK SMART. Most terrain parks post these signs as a way to not only let riders know the size of features used, but also to establish expected etiquette. The sign’s acronym stands for the following:
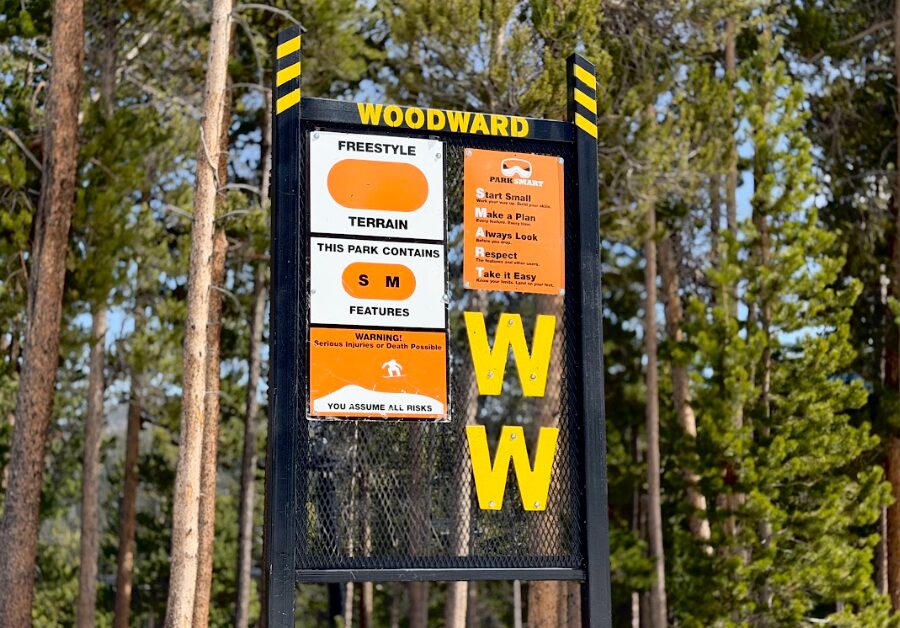
Start Small: Work your way up. Build your skills.
Make a Plan: Every feature. Every time.
Always Look: Before you drop.
Respect: The features and other users.
Take it Easy: Know your limits. Land on your feet.
This may sound cliché, but safety here is key. We are working with metal after all. It’s important that we view these features as useful tools for building skills, not playground toys. When it’s our turn to go, let’s establish calling out our drop (“Dropping In!”)–that way, other riders are aware we’re about to take our line and use a feature. Once we’ve landed safely, ride away from the feature so that others can have their shot.
PARK SMART as a code of conduct, is also part of the Responsibility Code (established across all U.S ski resorts) for modeling safety-oriented practices on the slopes. Let’s lead by example for other guests, and apply this method everywhere we go across the mountain–not just the terrain park.
Before trying out any of the features, I advise riding through the park first to see what’s on the menu. Always assess your surrounding environment. Ride past each feature on the side of the run (without blocking the road). Look for what seems doable for your own practice level. Weather can change throughout the day, which in turn has an impact on the overall snow conditions–especially ramps and landings for each feature. On warmer days, make sure the snow hasn’t melted to the point of features becoming overly lopsided or slanted sideways (this can affect your balance as you perform tricks).
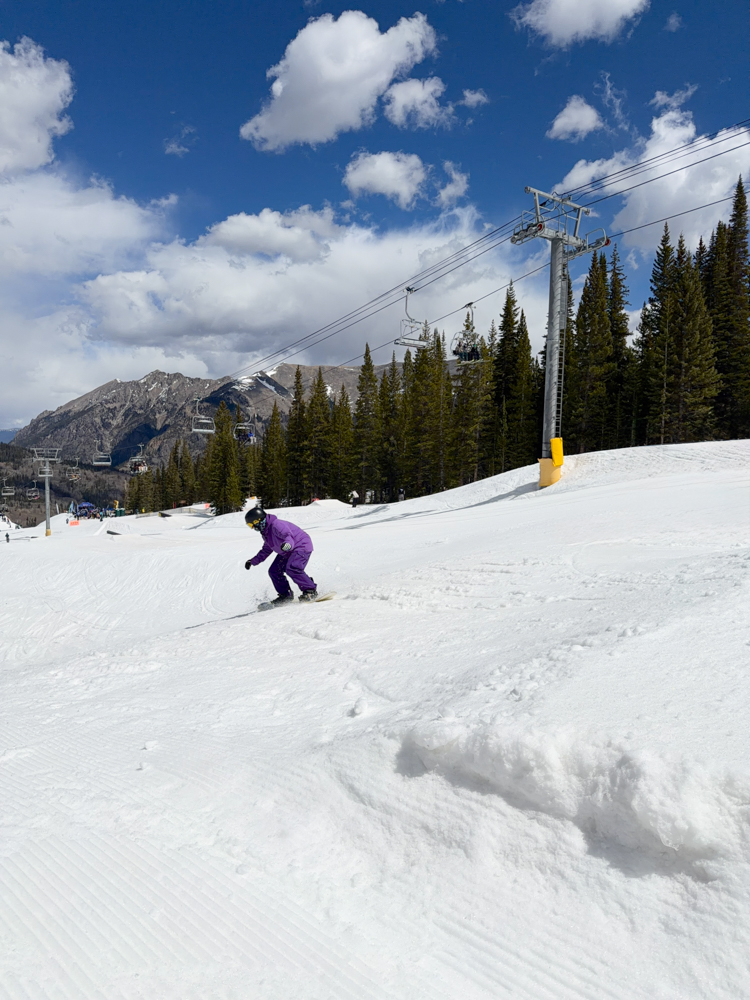
If you’re brand new to this process, scope out small, flat ride-on features (where the ramp/lip leading up to the feature connects to the feature itself). Usually, these consist of short ride-on boxes; either wide, narrow, or an offering of both. If the terrain park you’re at is built in a progressive manner, usually beginner/introductory features and jumps can be found closer towards the start of the park (or right at the entrance). As you ride further down the line towards the park’s exit, the more advanced the features/jumps get.
Once you finish your first run and have a solid idea of what the park layout looks like for the day, head back to the lift. You’re now ready to practice!
First Tricks to Learn
Ground Tricks
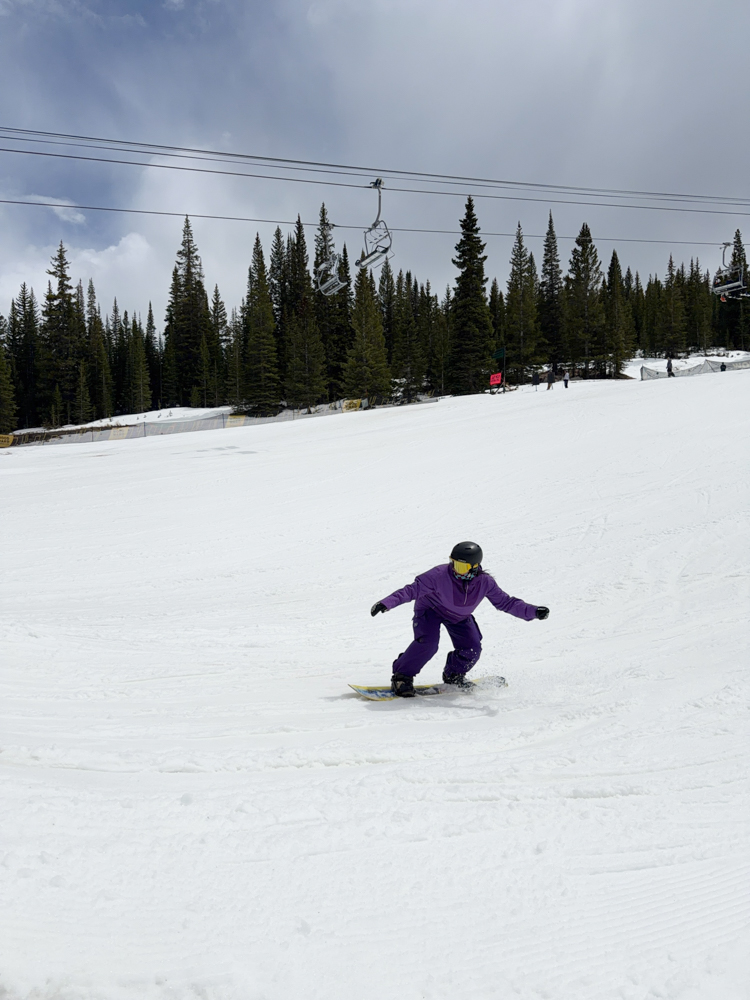
Referencing the S in PARK SMART, let’s start small to build up skills. Before we approach any feature with a trick, practice it where the terrain is mellow. Usually, this means finding a green slope with flat spots to work with, before going into the park itself. Choose a spot that’s flat enough for you to remain locked into place on you board, without sliding away.
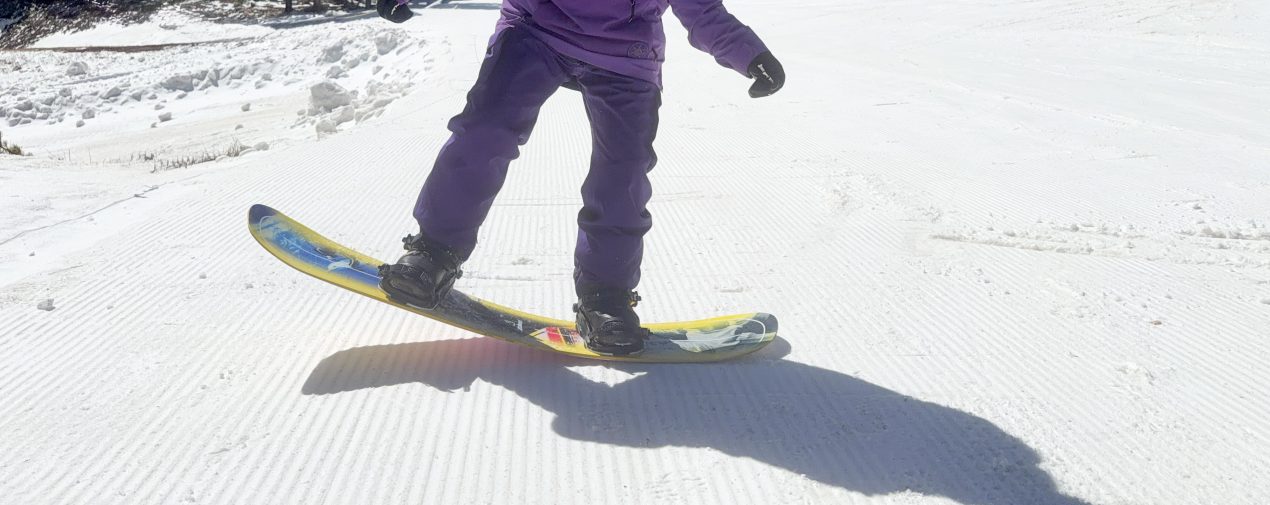
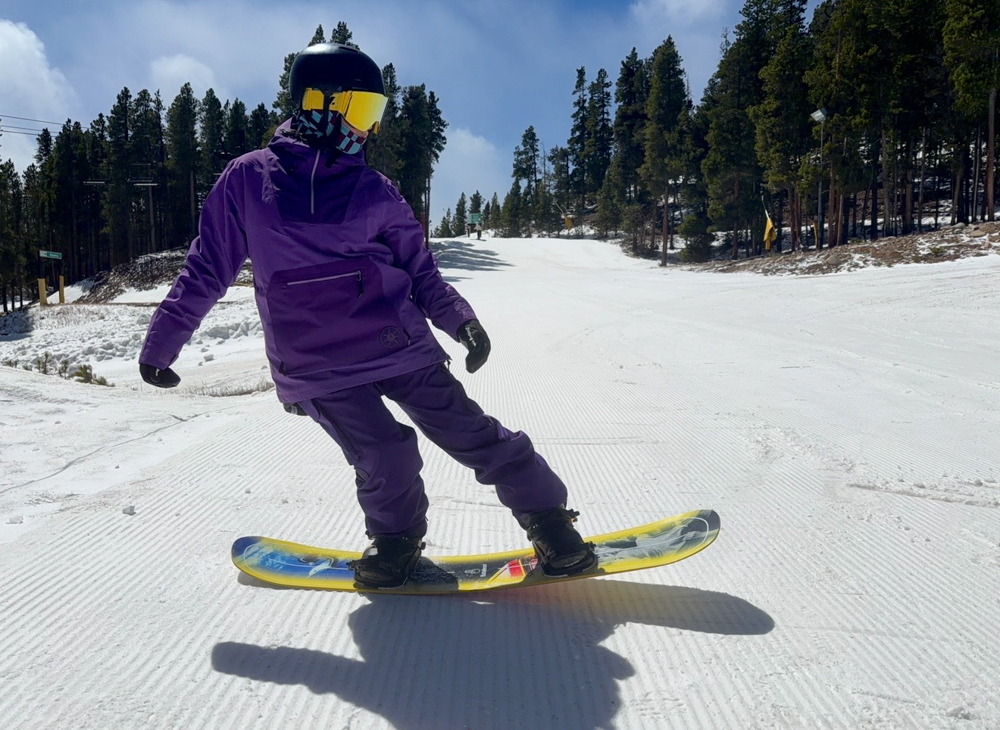
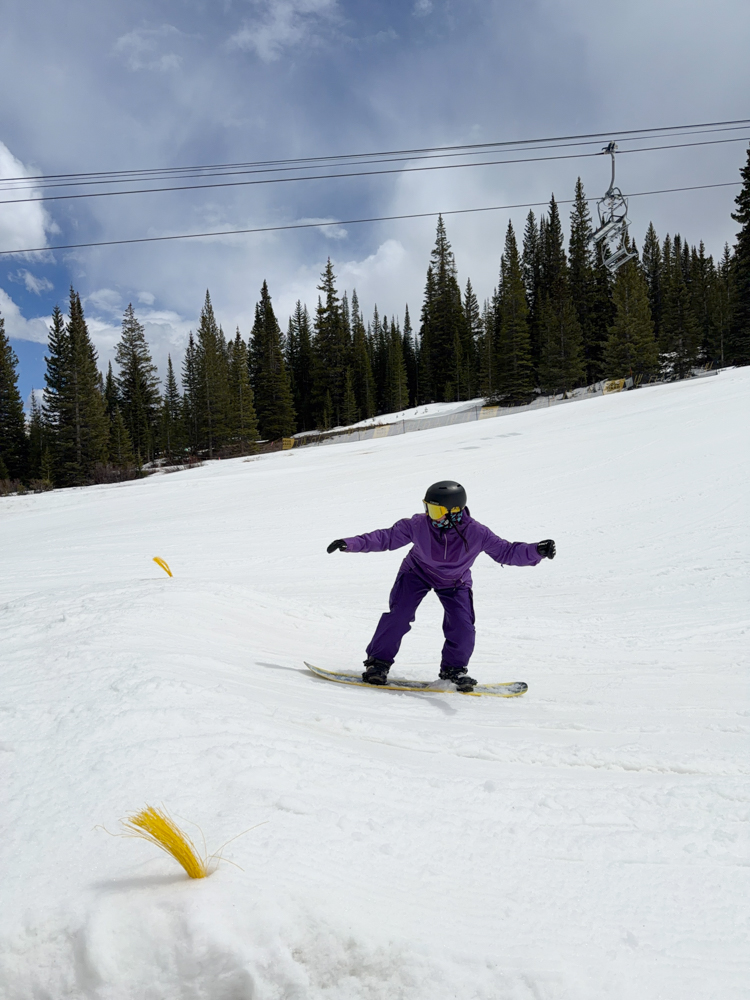
Nose & Tail Press:
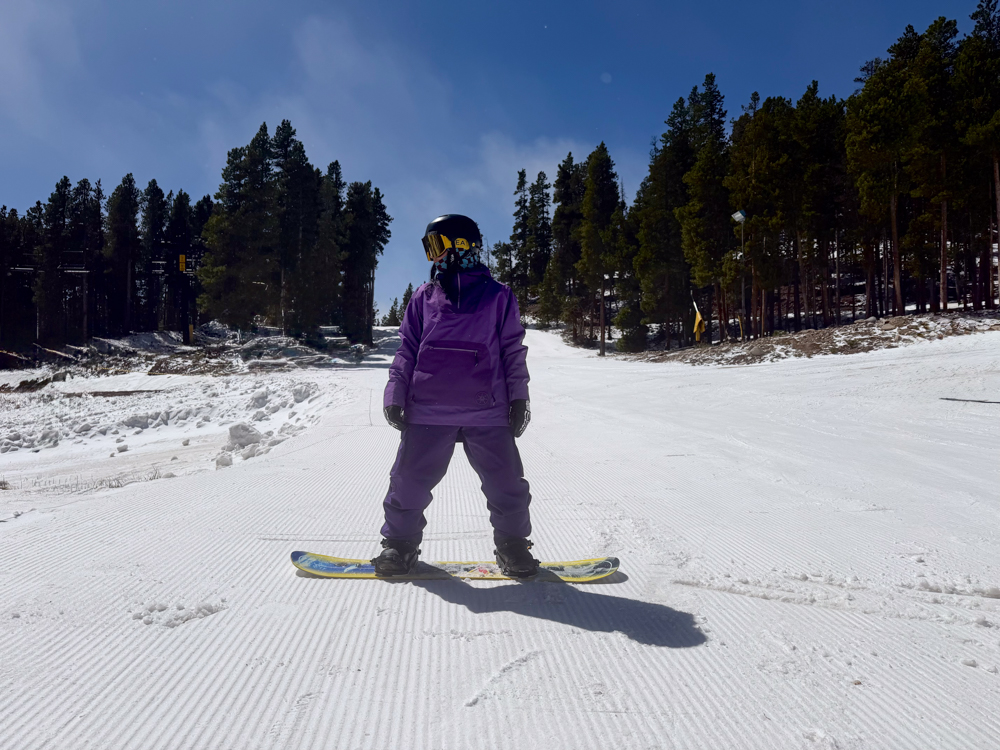
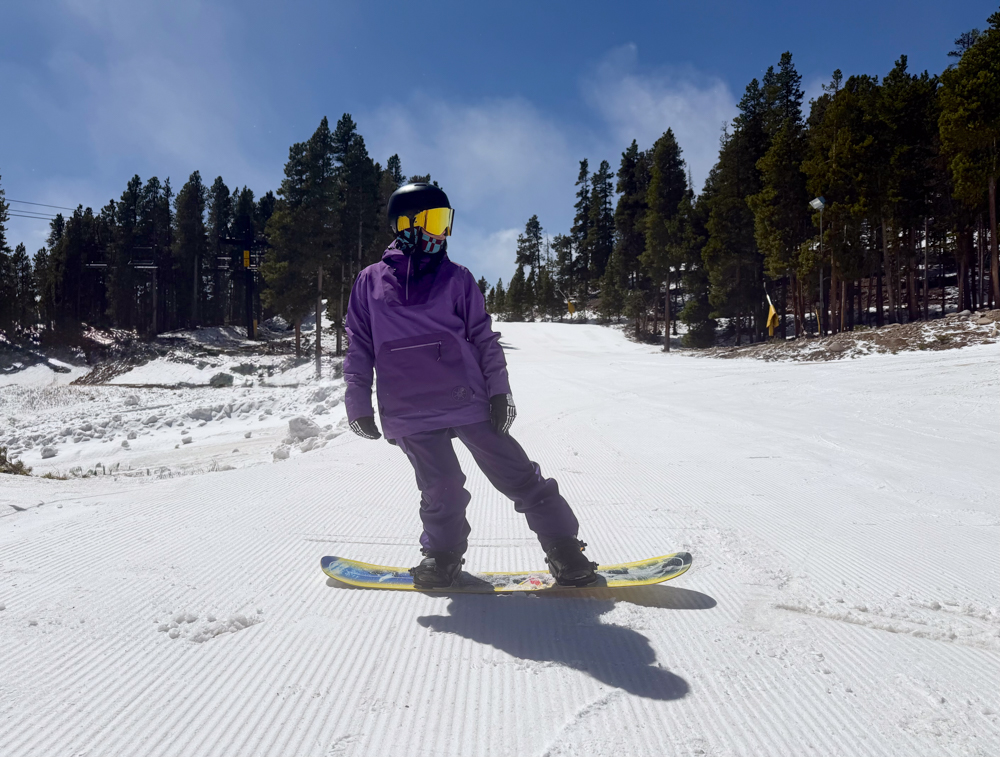
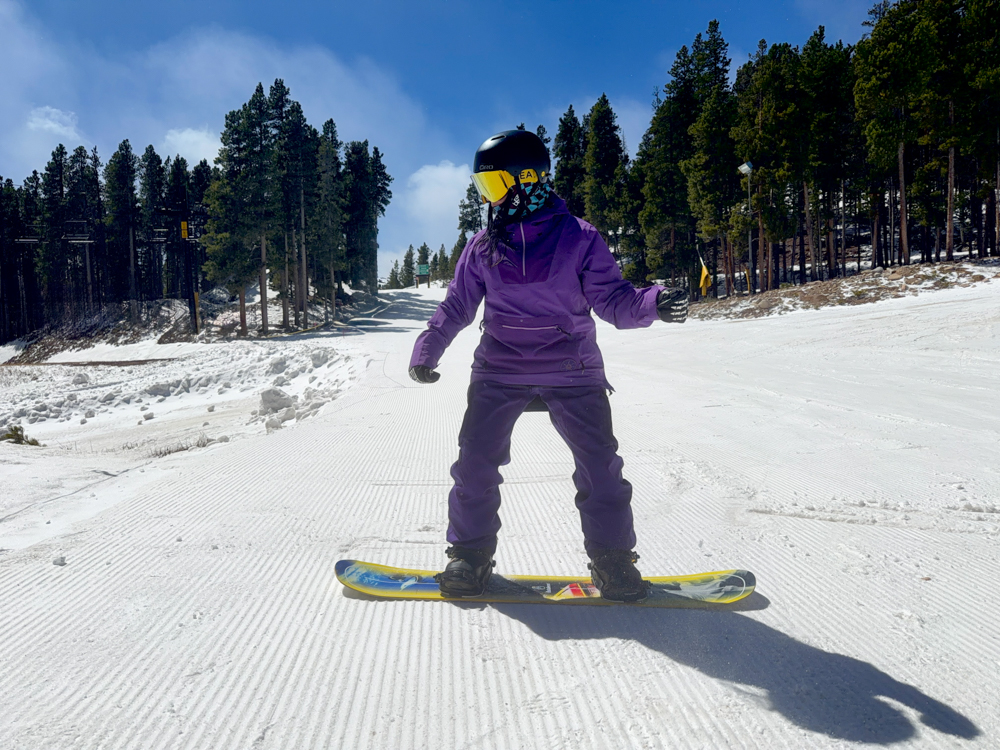
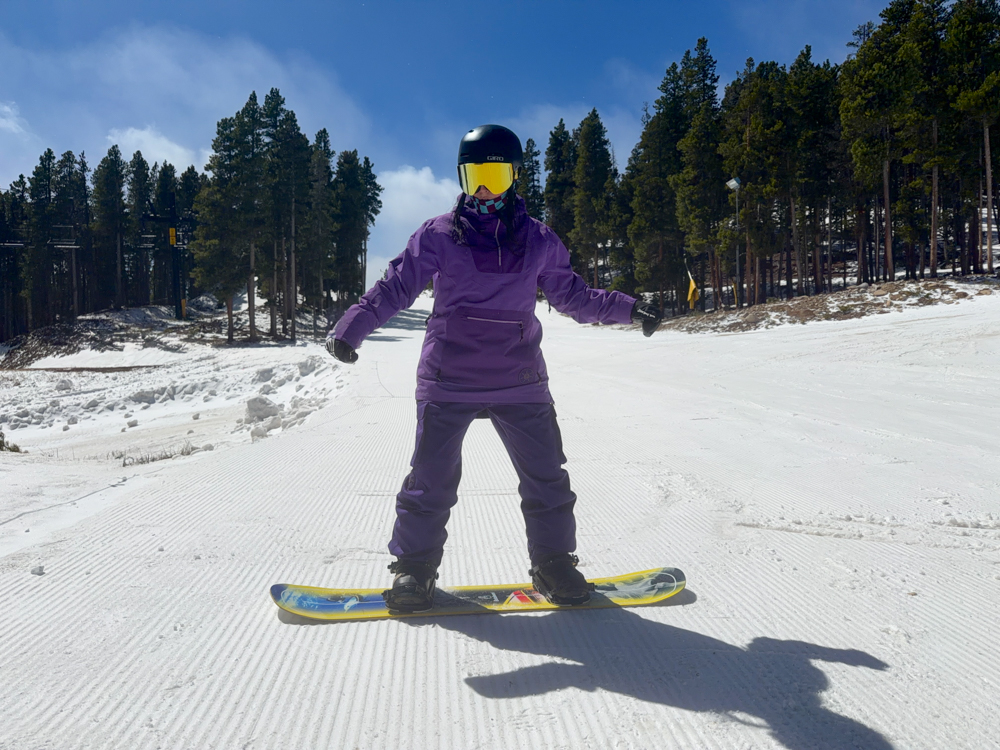
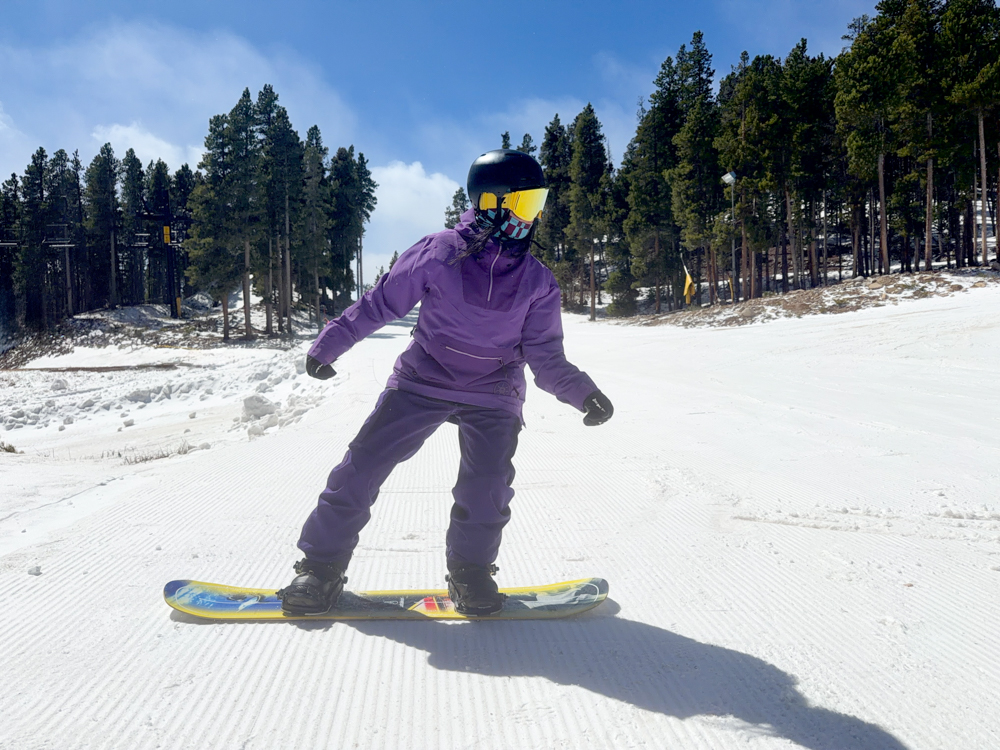
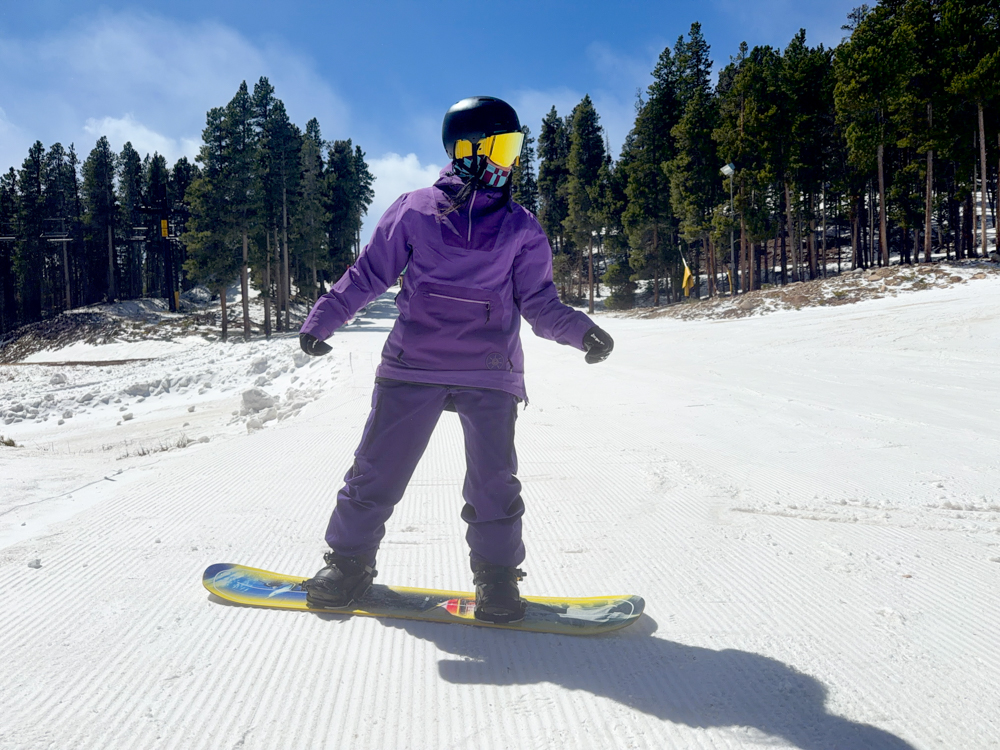
Stand stacked over your snowboard in reference alignment (a.k.a, athletic stance)–meaning flat feet (the board is not on an edge) with bent (flexed) knees, and a straight spine. Keep shoulders over hips, tailbone tucked, and arms down on either side. *This posture is foundational for how we approach a feature or jump.
Nose Press
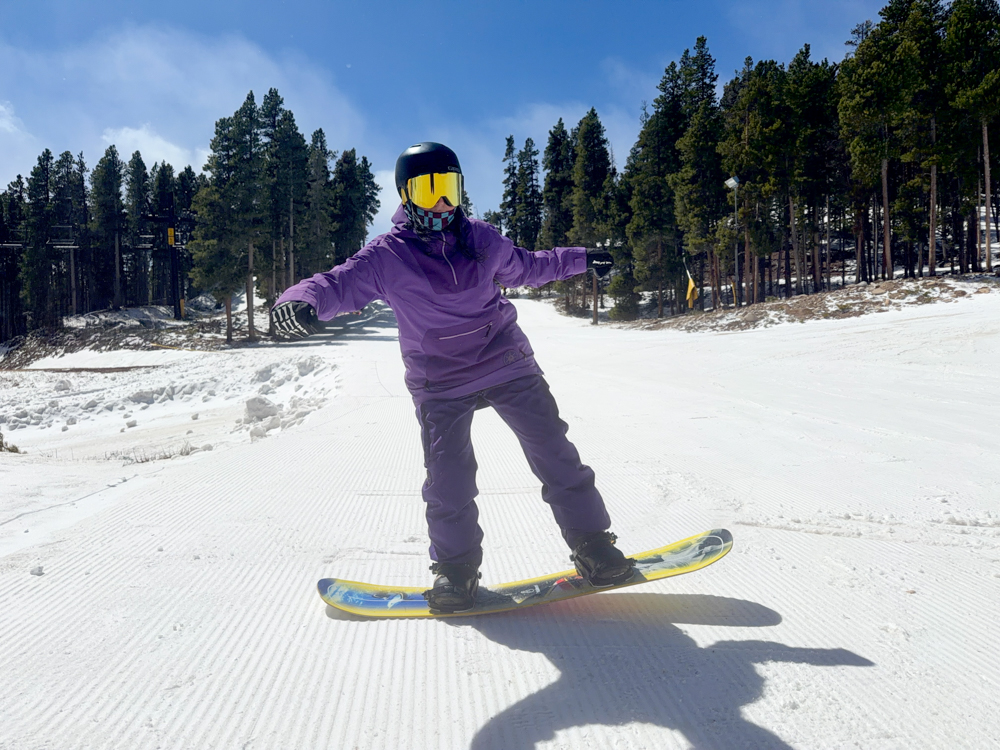
Using athletic stance, begin shifting your weight into the lead (dominant) foot–simultaneously moving your lead shoulder, hip, knee, and ankle over the whole nose, keeping the base (bottom) of the snowboard flat. Make sure that your upper body remains stacked in this weight transfer. While the lead knee bends, slowly extend the rear (non-dominant) leg. You may find that the rear knee starts to rotate inward slightly towards the lead knee (this is normal). As you keep pushing weight forward into the nose, the tail will begin to lift off the ground.
Pro Tip: As the tail rises higher, keep your shoulders aligned and stacked over the length of the board, with your chest up (not externally rotating) to hold balance.
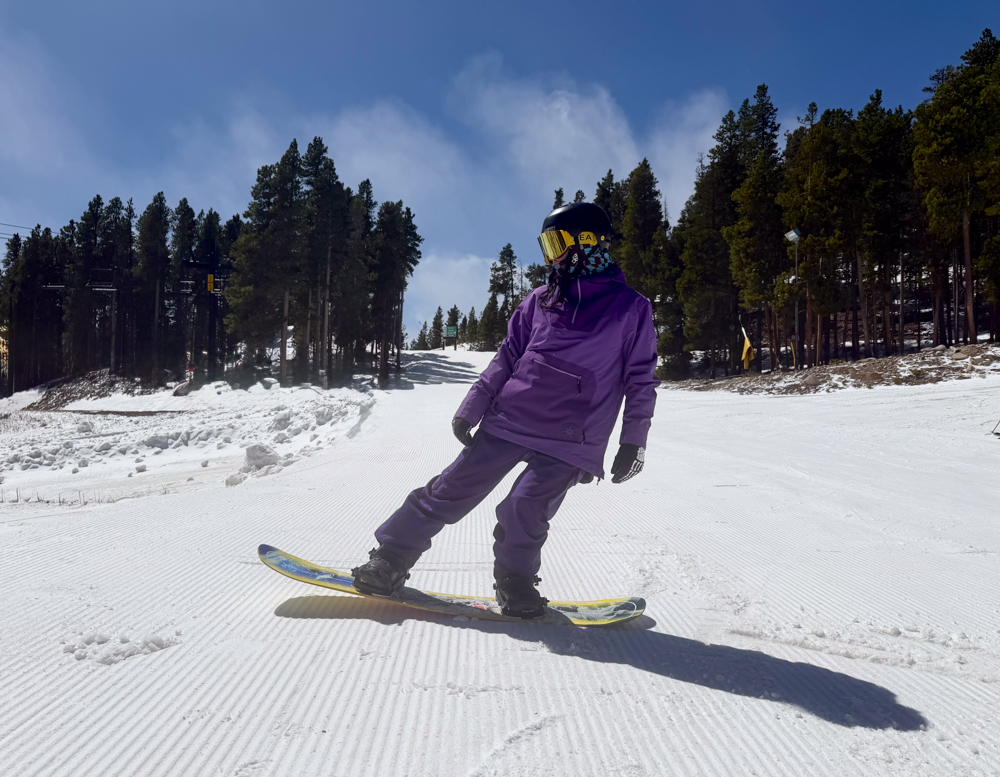
Tail Press
This is the same exact process as a Nose Press, only this time weight is shifted into the rear (non-dominant) foot, over the tail (reference steps above). Through this new weight transfer, and in keeping your body stacked over your equipment, the nose will now lift from the snow. For Regular Footers (left foot dominant), your weight will move into the right foot over the tail. And for Goofy Footers (right foot dominant), your weight will move into the left foot over the tail.

After practicing both Nose and Tail Press several times (*remember, repetition is key) on static, flat terrain, these tricks can now be applied in motion–sliding slowly across your chosen mellow (low, simple incline) green terrain (or beginner slope). When sliding on snow into the fall line (down the slope), be mindful that a little bit of movement goes a long way, and make sure to keep the base of the board flat when shifting weight into one end (to avoid catching edge).
For Tail Press, keep your gaze over your lead shoulder down the slope. For Nose Press–and only if you feel comfortable–you can momentarily look (a second or two) over your rear shoulder towards the tail (to see if it lifts) as you slide, before redirecting your gaze back over the lead shoulder. See if you can hold the press for a couple seconds, and then slowly release back into your normal athletic stance.
Ollie & Nollie:
Okay, let’s build upon what we’ve already learned so far. Return to your designated flat spot, and find your athletic stance again. We are going to practice new tricks statically, before applying anything in motion.
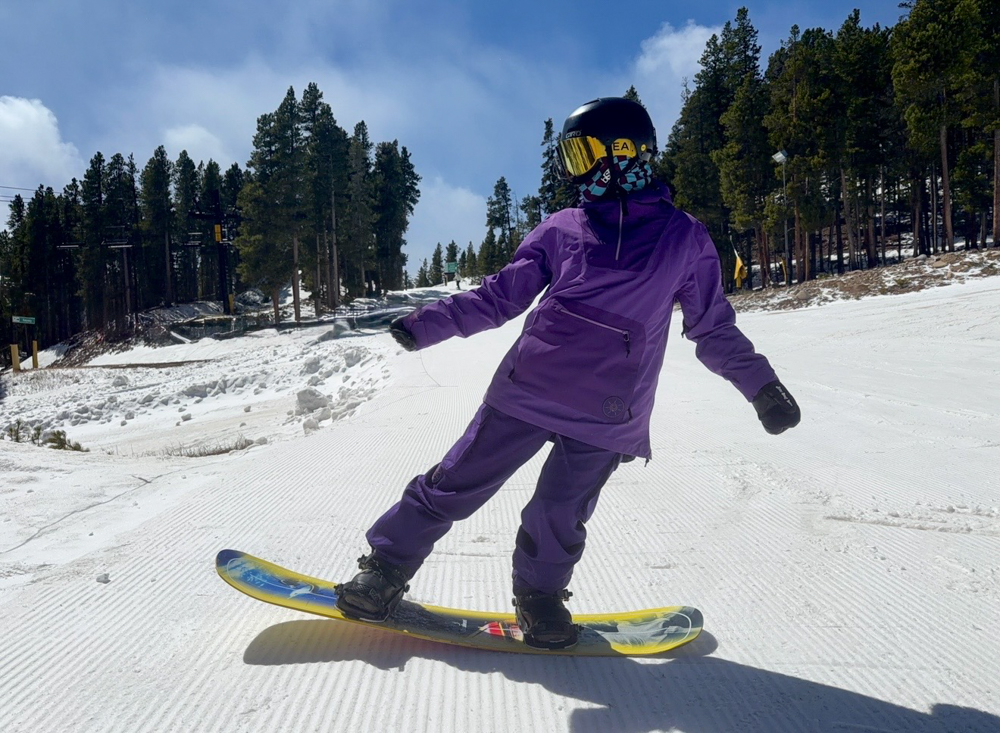
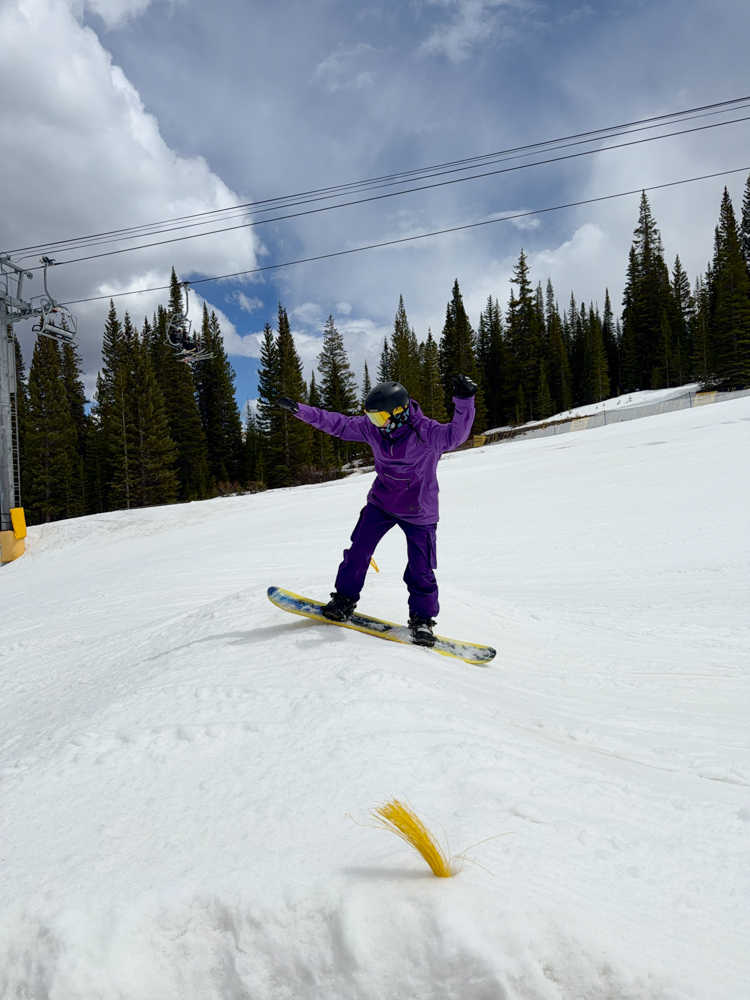
Ollie (Tail Pop)
Now that we have a stronger understanding of weight management across the length of our boards, we can apply a trick that incorporates an element of pop. Ollies are foundational for freestyle snowboarding, in addition to being fun!
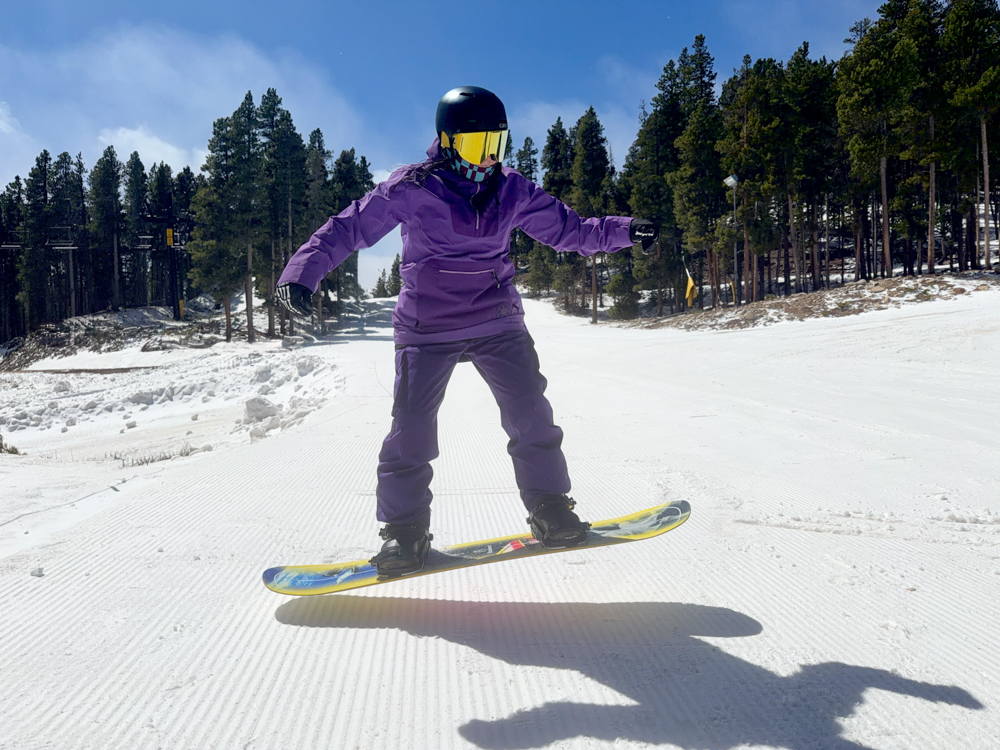
Start by getting into a stacked, flexed stance (bend your knees to become low), and then shift your weight into the rear leg to help spring-load the board’s tail. As you do this, begin lifting the lead foot at the board’s nose (the board will drive forward in the process). Once the nose lifts off the snow, extend the rear leg to pop off the tail, guiding both feet upward into the air.
While in the air, your legs will retract momentarily and the board will level out. As the board returns to the ground, begin to extend your lead leg (followed by your rear leg), and land flat with both feet simultaneously. The end point of this trick is to land the base of the board as flat as possible, in order to absorb the snow and remain stacked.
Nollie (Nose Pop)
Essentially the same movements as the Ollie, but instead using the lead leg to spring-load and pop off the nose of the board (hence the N for Nollie).
Once you’ve practiced both a few times each on flat terrain (and can land flat), it’s now time to apply these tricks in motion. Usually one end of the board feels stronger and more natural over the other with these specific tricks. So select the trick you gravitate towards the most and start from there. Begin on your chosen gentle slope by remaining stacked upright and sliding flat (our boards are not on edge), nose pointing down the slope. Utilize a tiny amount of speed here–we don’t need to go very fast.
As you are slowly moving down the mellow terrain, apply the trick in motion by pushing weight into your chosen end on the board (tail or nose) to spring-load and pop off. Use your legs as shock absorbers to help you land flat.
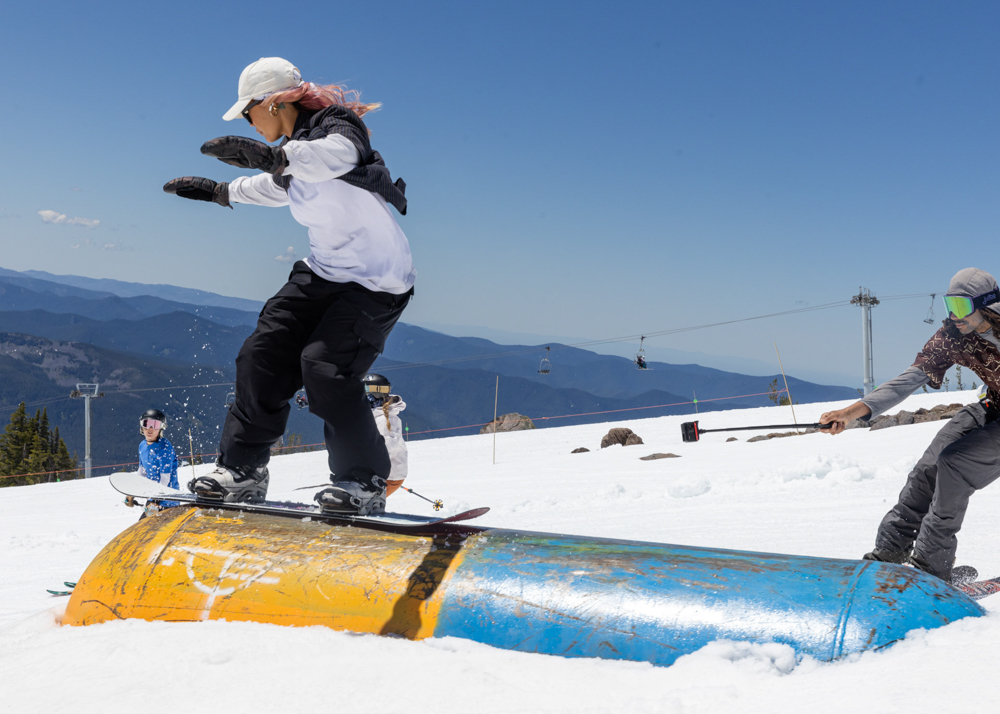
Ride-On Boxes
Time to introduce our first official feature. Ride-on boxes are (in my opinion), the most approachable to learn basic maneuvers on. Especially if they’re short in length, are wide, and low to the ground. They are the essential building blocks for progressing onward to more complex features down the line. Any time you’re learning a new trick, first test it out on flat snow (as we’ve been doing thus far), and then try it out on a box. In fact, it’s helpful to first draw out the box within the snow for practice, as something low consequence.
In addition to PARK SMART, there’s one more acronym to discuss here: ATML. This acronym applies to the four phases of a trick, and how to use each phase across the feature itself. It stands for the following (in order):
Approach: The chosen line leading towards the feature.
Takeoff: The ramp-to-lip entrance onto the feature.
Maneuver: Your chosen trick across the length of the feature.
Landing: The feature’s exit point/end of the trick.
The ATML Model was developed by PSIA-AASI as a movement analysis method, for helping riders break down tricks into digestible steps. Instructors certified to teach freestyle will already be familiar with this method. Let’s go ahead and apply it here with our first box trick.
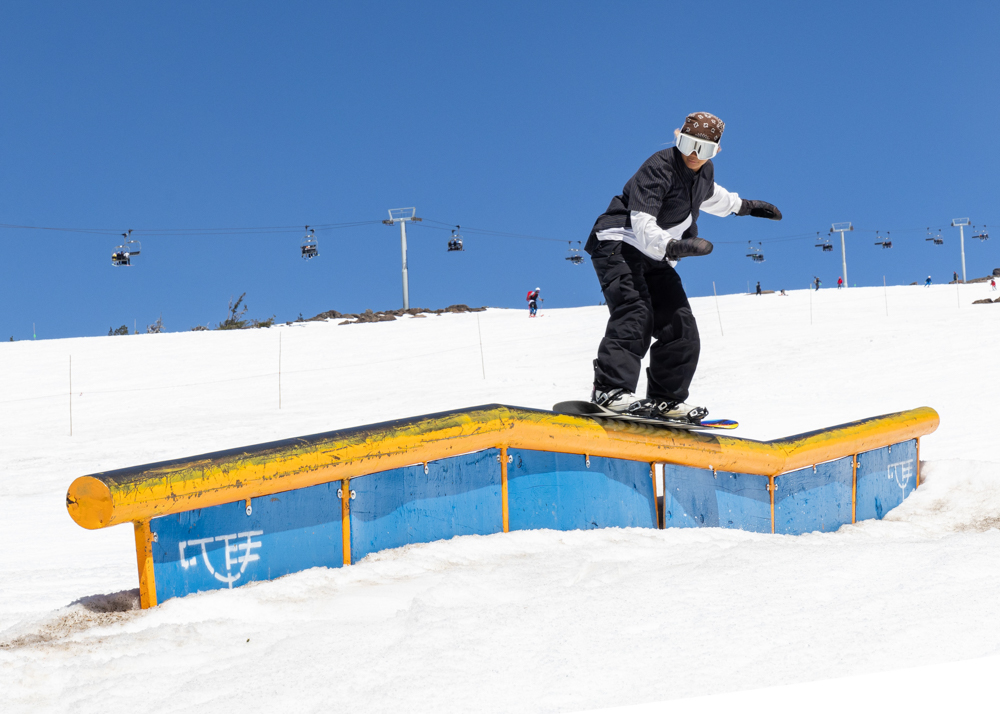
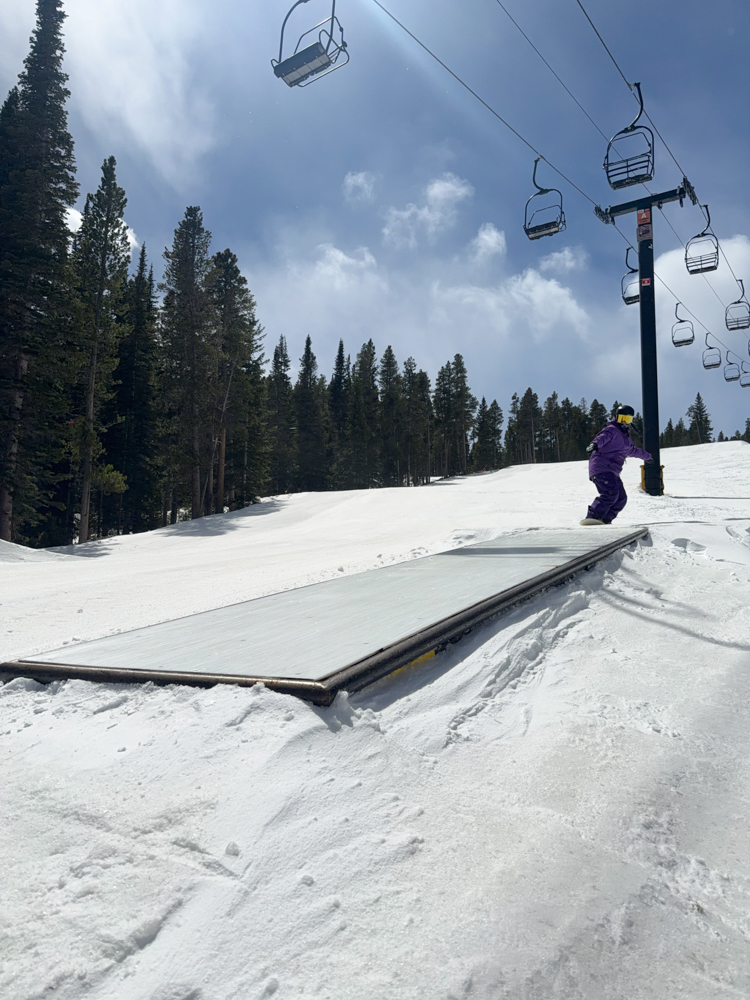
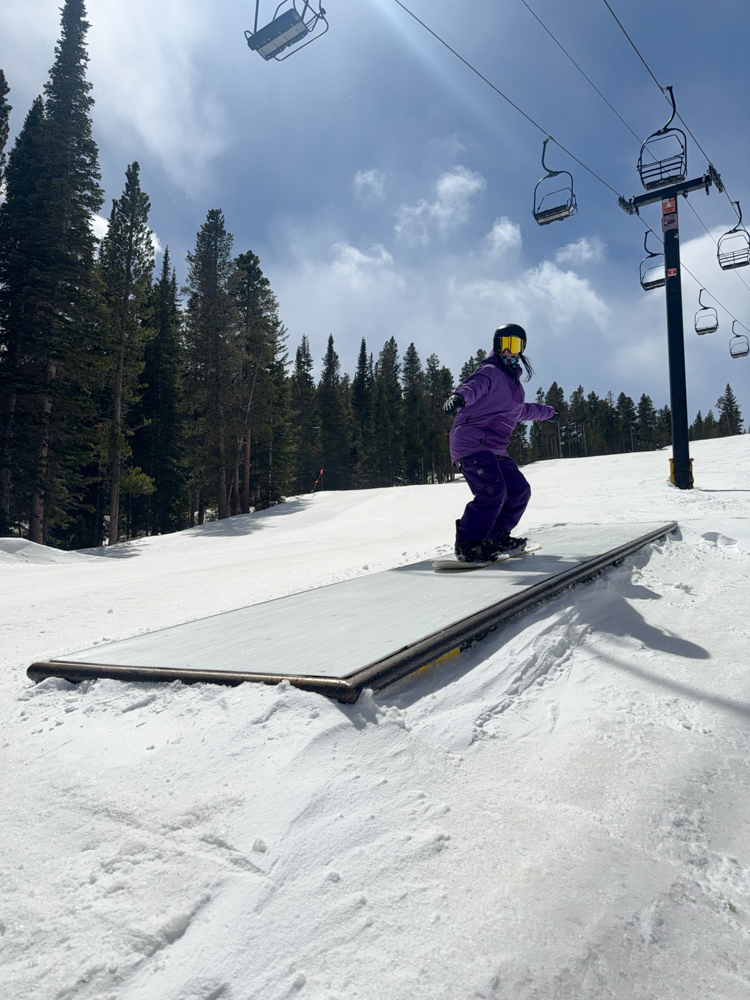
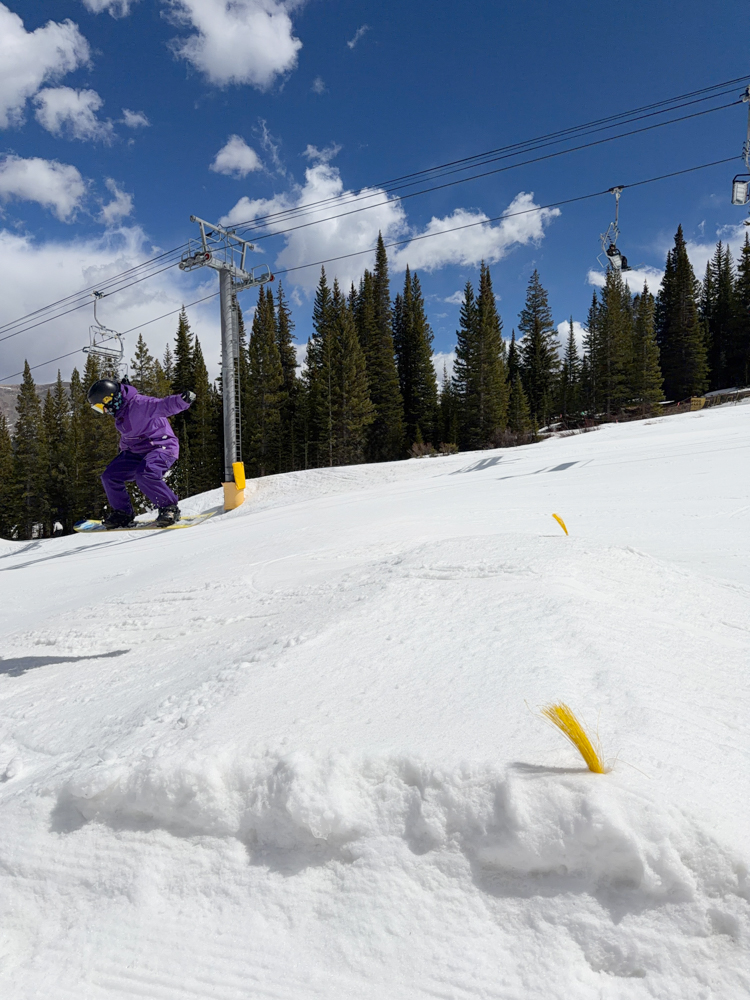
50-50
This feature-based trick sets the foundation for all others. It involves the length of the snowboard matching the length of the box (parallel), so that the rider can slide across in a straight line.
Approach: Start from a few feet away to build a little speed. Hold your athletic stance to maintain a stacked, neutral posture over your snowboard as you slide forward. Keep your snowboard base flat as you get closer. Line your nose up straight before the box’s entrance.
Takeoff: As you ride up the ramp-to-lip of the box, keep your body stacked and your knees bent. Make sure that your base remains flat (no edges). Look towards the halfway point on the box (not your feet) to help keep your alignment via focal point.
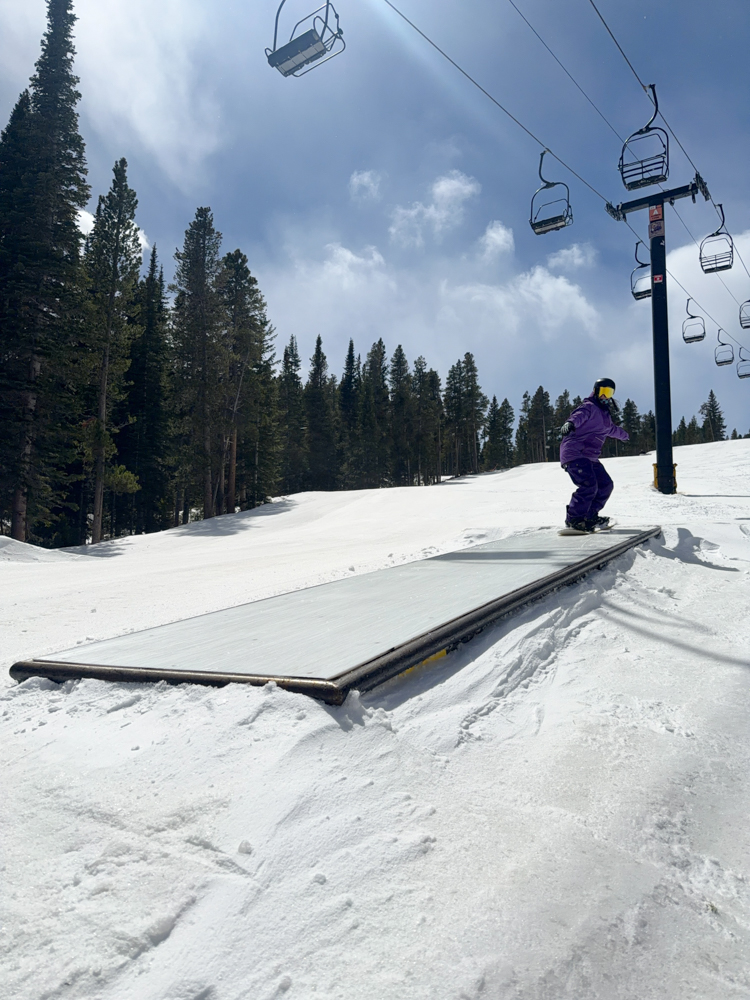
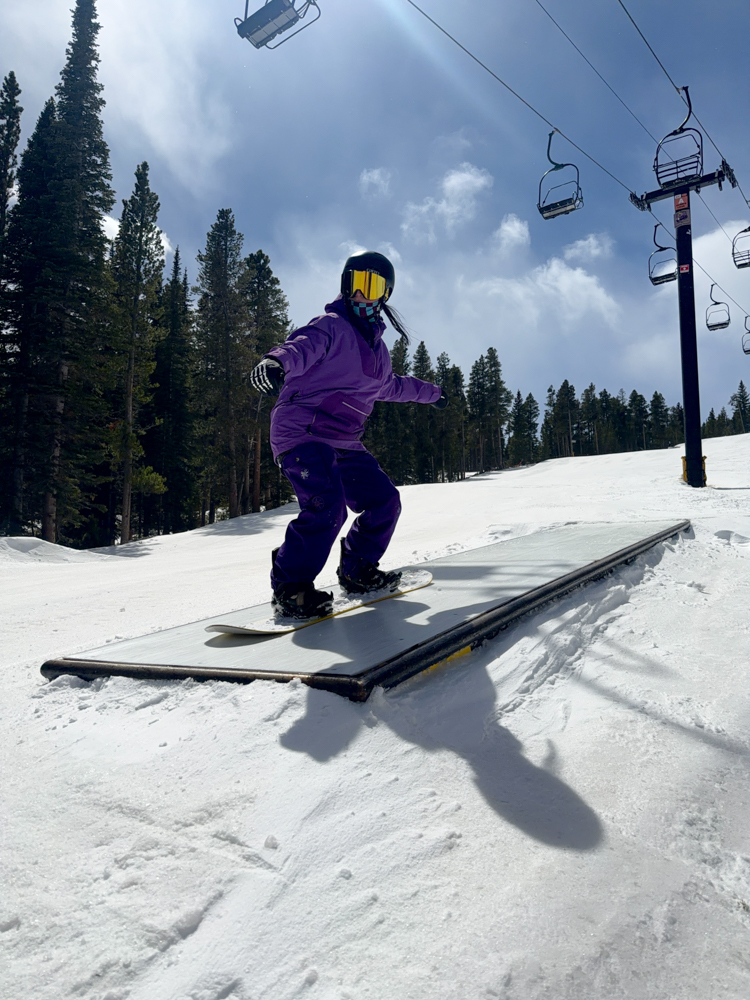
Maneuver: As you slide across the box with a flat base, shift your gaze towards the feature’s exit. While doing this, keep your weight centered and balanced.
Landing: As you reach the end of the box, land your board flat into the snow, keeping your body stacked upright. Allow your feet to absorb the landing by first sliding flat across the snow for a few seconds. Then ride away smoothly with normal turn connection.
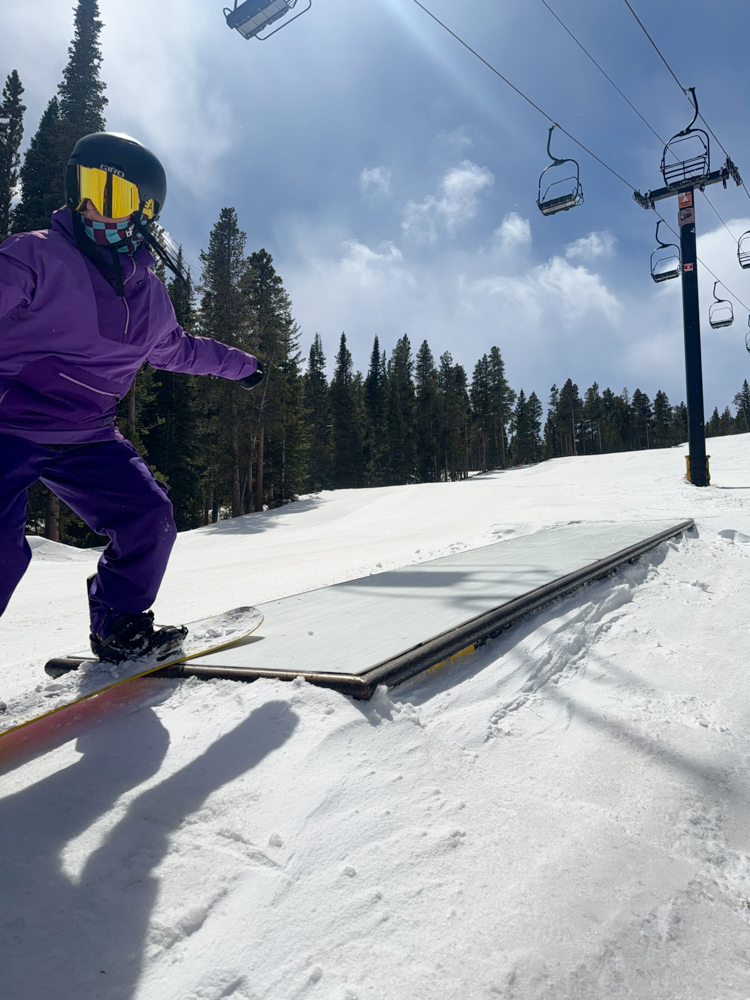
Pro Tip: Across all four phases of this trick, your board is flat. If you find yourself sliding off the box at a slight diagonal, don’t panic, but also don’t fight it (doing so could put your board on edge across the feature). Instead of autocorrecting your line, trust yourself to stay centered as you land both feet flat.
Amp-Up: Repeat this process several times until you’re fully comfortable with the trick. Definitely don’t rush your learning here (it’s a marathon, not a sprint). Once you’re ready for a new challenge, seek longer boxes to work with. Or boxes that are narrower and more elevated from the snow. There’s many different styles to choose from. Apply the same ATML method for 50-50 on each box you practice.
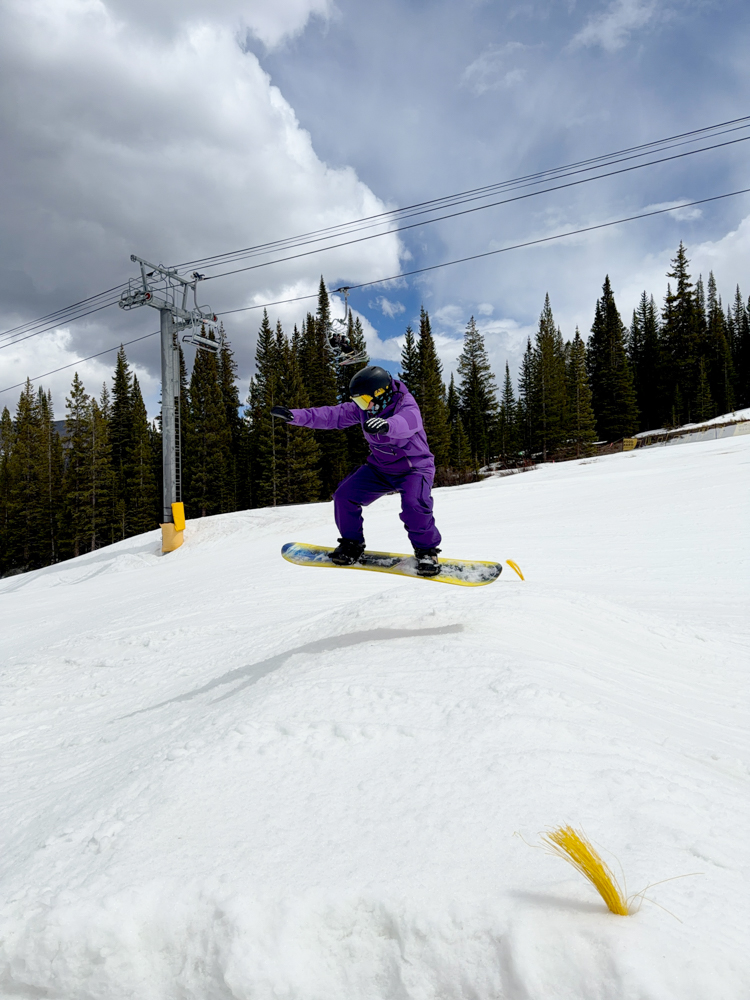
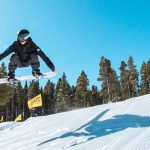
Jumps
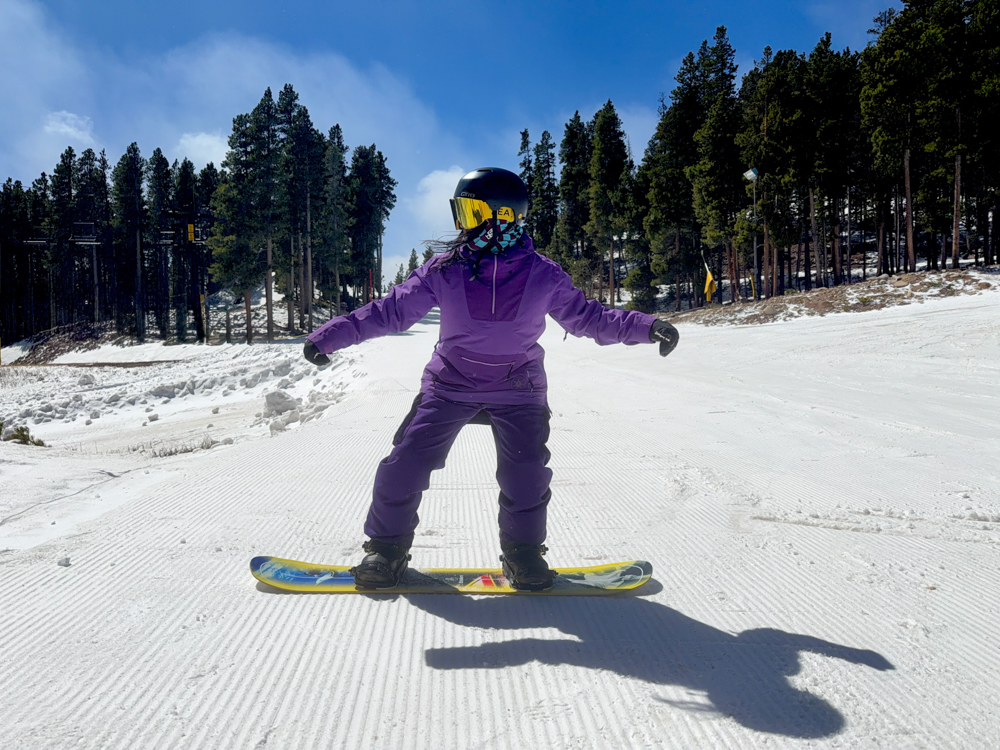
These are a personal favorite. And this is coming from somebody who experiences vertigo from time to time. What’s nice about jumps is you don’t have to start out performing some big maneuver. In fact, to warm up, begin by practicing on your designated green slope. We’ve already gone over Ollies and Nollies.
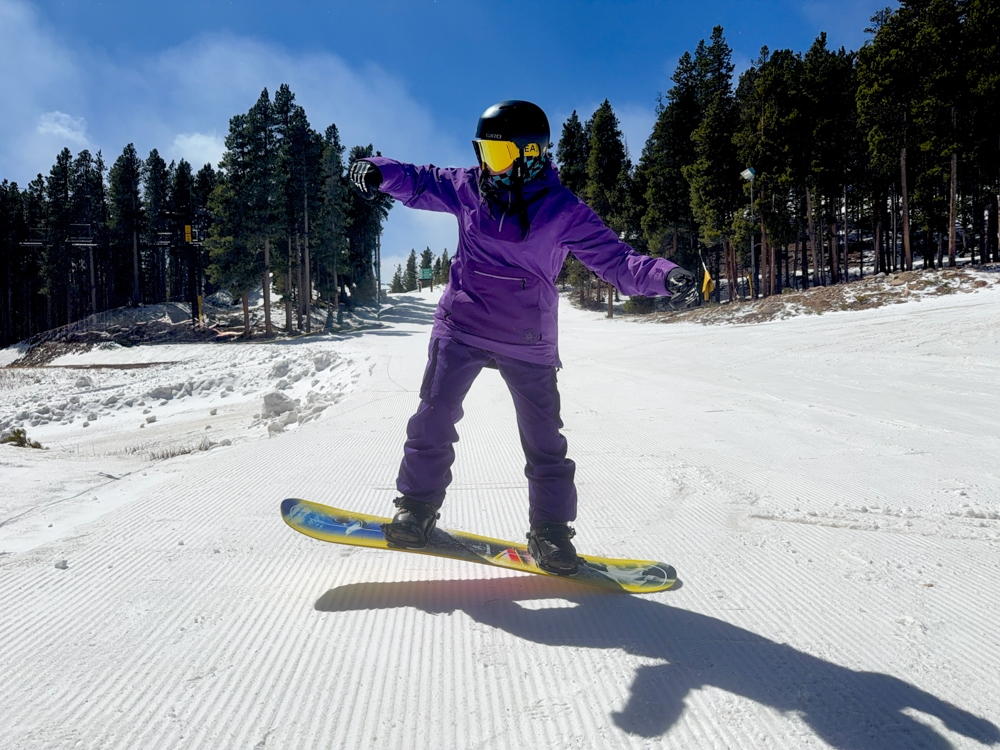
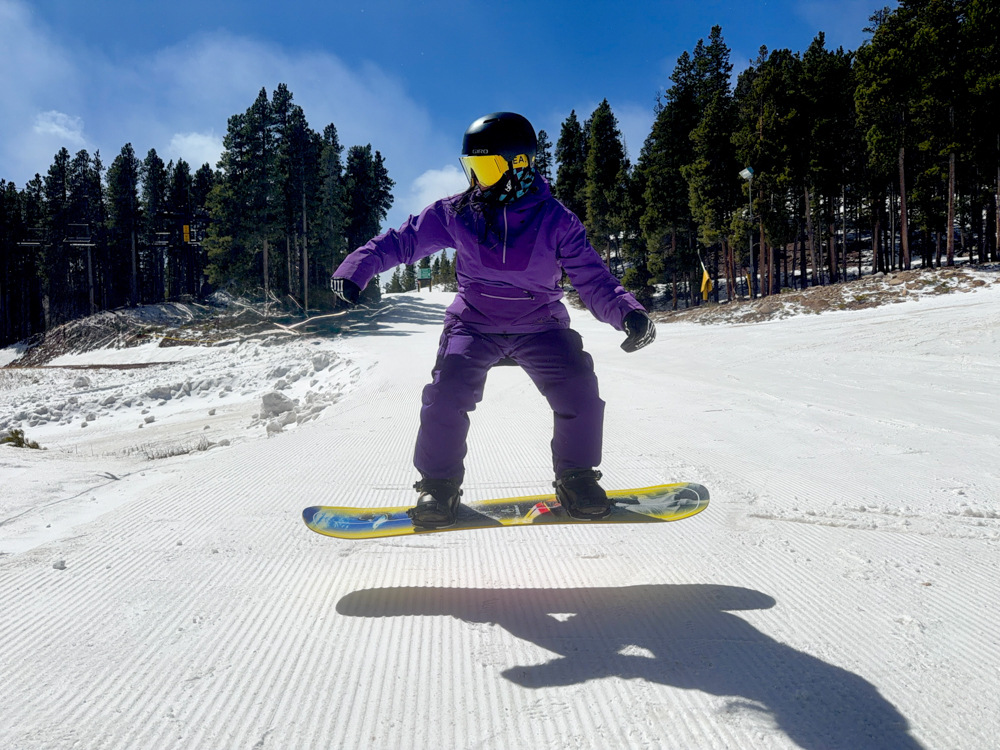
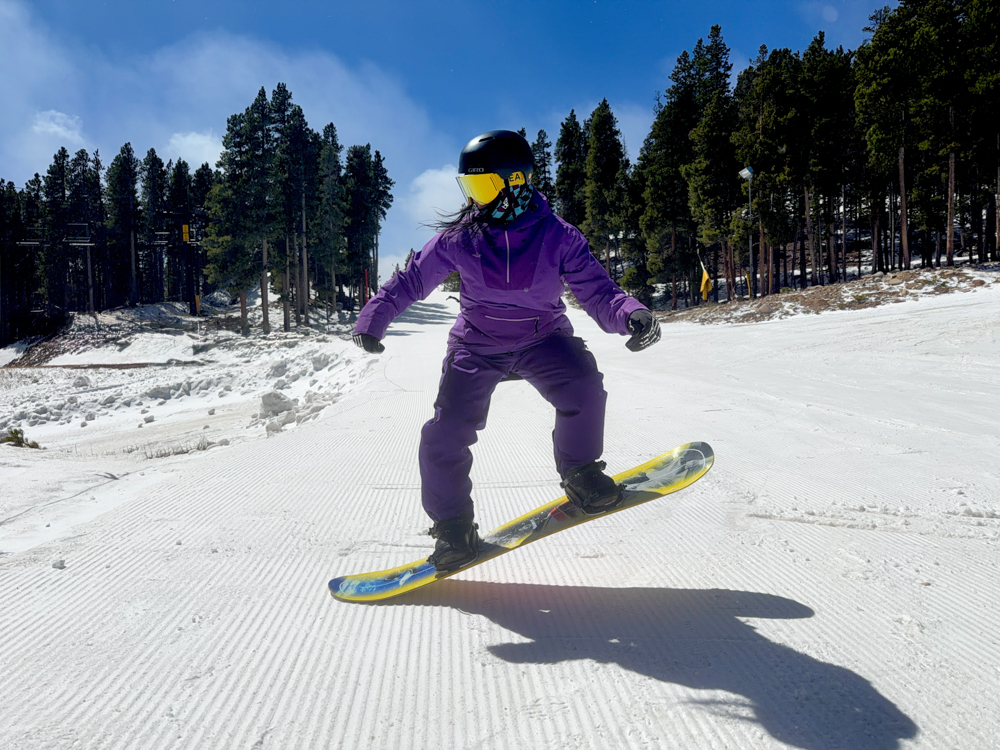
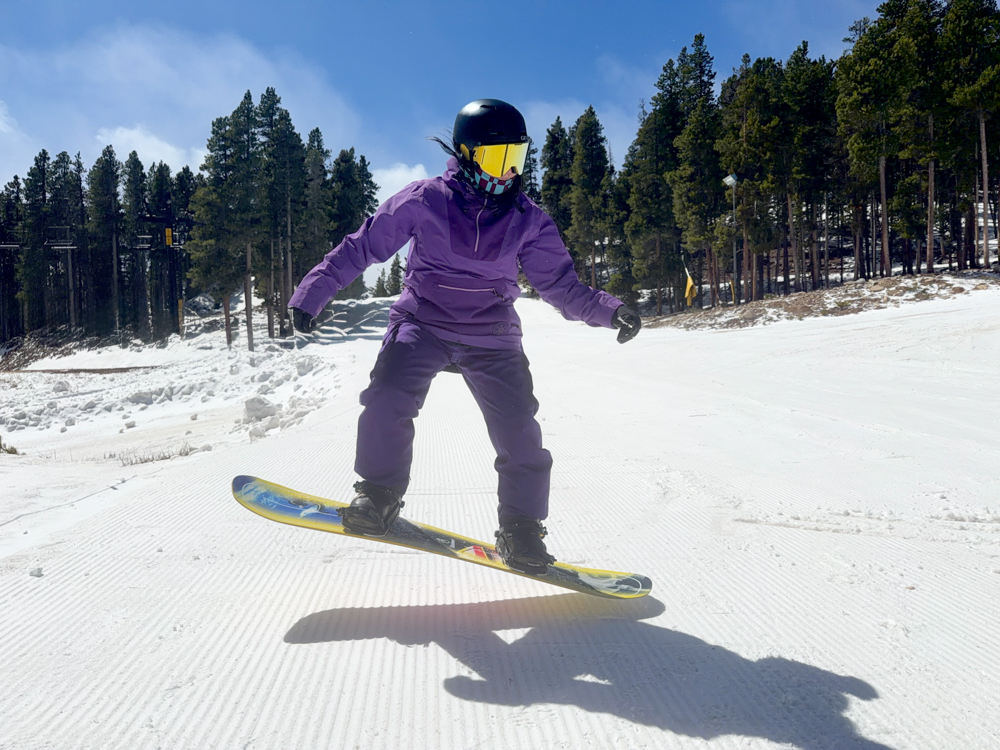
Start in your selected flat spot by standing stationary and locked into your equipment. As you stand stacked, get flexed in the knees before extending both legs simultaneously in a two-footed pop (*different from an Ollie). As you extend, bring your knees upward momentarily for stability (retraction), before landing both feet evenly flat. Sometimes it helps to wind up in the process. Repeat this a few times before applying it in motion down green terrain. See if you can start out sliding flat; pop, retract (bent knees), and then land stacked to slide flat again. For a visual cue, draw a line in the snow down-slope and see if you can pop over it. Lastly, keep your shoulders aligned with the length of your snowboard–hands over nose and tail.
This particular trick is called Straight Air. It’s used to build pop and form, without incorporating any spins. Like 50-50 for a ride-on box, Straight Air is the first thing you learn off small, low-penalty jumps. Now that we’ve established some practice under our belts, let’s turn our attention to the jump line.
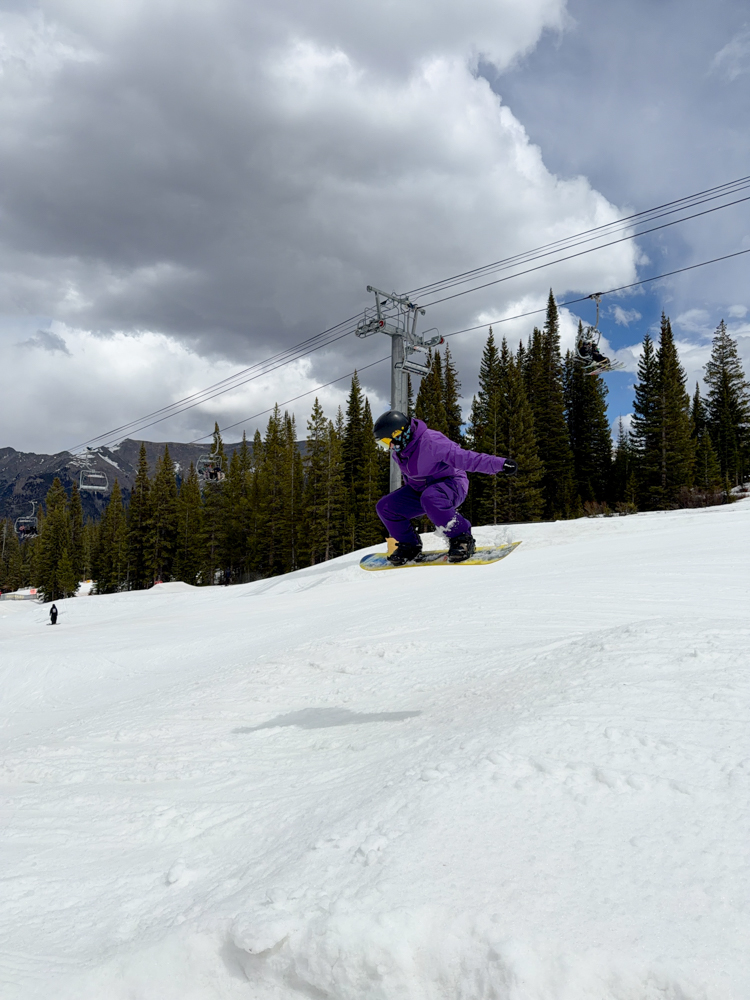
Straight Air
Approach: Find the smallest jump to work with–meaning, a jump built with minimal knuckle (or sometimes no knuckle at all). Position yourself on the slope above the jump. Allow yourself enough distance to build up some speed. We need just enough speed to get over the jump’s lip in a controlled manner. Finding your athletic stance, approach the line with bent knees and a flat base–pushing the snowboard’s nose down the slope and sliding forward.
Takeoff: As you build speed down the line towards the jump’s ramp, get low and stay flat. Avoid turn connection–doing so can kill your speed. Keep your body stacked and aligned as you slide up the jump’s ramp to the lip. Building acceleration here, focus your gaze out over your lead shoulder. Trust yourself to make the commitment. You’ve got this!
Maneuver: Once your lead foot reaches the lip (top of the jump), extend both feet simultaneously (and momentarily) to pop upwards. As your board lifts off, bend your knees slightly to retract (*the more flexed your knees get, the more height you create out of the pop). While airborne, keep your arms steady on either side, over the length of the board. Stay stacked. Now turn your attention to the landing zone.
Landing: As you begin your downward trajectory, keep your board parallel to the landing. Make sure you still have a micro-bend in your knees to absorb the impact. Once your board touches snow again, land straight and flat between both feet. Slide forward smoothly a few seconds before initiating turn connection–clear the landing zone immediately.

Pro Tip: In the Approach phase, if you need to apply a speed check beforehand, do so with a couple turns at the top of the slope above the jump. Or, alternatively, you can start lower down the slope and ride into the line without speed checks. *What’s key here is not making any speed checks/turn connection once you’re riding up the jump’s ramp in the Takeoff phase. It’s all about having enough speed and timing. Play around with it. See what works best for you.
If I notice that students are nervous about the jump line, I tell them they can always start with rolling flat over the top of the jump (as long as it doesn’t have a defined knuckle)–skipping the Straight Air trick altogether. Just to test it out.
Amp-Up: Again, repetition builds skills. Get comfortable practicing the Straight Air method on small jumps. Then–only when you’re ready to move on–take this same approach towards intermediate (medium-size) jumps. And so on and so forth.
*As you build upon these foundational tricks with new ones, use these step-by-step evolutionary methods for successful progression.
The Final Word
I’m sure you’ve picked up by now that these practices build upon one another. When you break tricks down into bite-size steps, they become much more approachable to learn. And obviously, these aren’t the only tricks freestyle has to offer. But they are a good starting point. It’s important that you take your time cultivating your skills, getting comfortable with each one.
This whole process is like learning a new language. The more effort you put in, the more you improve. Over time, as you explore more complex tricks down the line (Butters, 180s, Boardslides, Grabs, the list goes on), you’ll realize that freestyle becomes a balance between the physical and mental. As you progress, you’ll discover (and rediscover) moments of exhilarating flow-state along the way. Not to mention personal “aha” breakthroughs.
One Final Note – Park riding is about the journey. Not the destination. I promise it’s all worthwhile!
About the Gear Tester
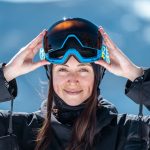
Amanda Cruz
Amanda Cruz is a certified snowboard instructor, yoga teacher, and DEI (Diversity, Equity, & Inclusion) advocate living in Boulder, Colorado. Having worked at Eldora Mountain Resort for the past four seasons, she has actively taught in her home mountain’s women’s-specific program. When not instructing or educating on the importance of equal representation in outdoor spaces, she’s most likely adventuring along the slopes, practicing freestyle in the terrain park, hiking, or going to yoga and coffee meet-ups with friends.
You can find her on Instagram at @ventureyogi
- Amanda Cruz

- Amanda Cruz
- Amanda Cruz
- Amanda Cruz
What a intriguing and amazing “how to” article for Park Riding. ľ’m not even a snowboarder and I found this article sooo explanatory, and well written. Also, the photos were so helpful for a visual how to support. I applaud you for your expertise, and also for this well written article!! Both a feat unto itself!