Pack Modding 101: Create Your Perfect Pack
How to craft your perfect pack, at home
“How many backpacks do you need?” is a critique from my mother that I still hear ringing in my head every time I drag one of my many packs out of the stack in my room. Of course, she doesn’t know that as an avid backcountry fan the answer for me will always be, “n + 1 backpacks are necessary to make sure my pack always fits my needs for a variety of adventures.”
I know for a fact I am not alone in this addiction, and I’m willing to wager that you yourself probably have more than just one trusty Osprey or your old Jansport. But how can dramatic dromedarian divas such as ourselves ever get the perfect backpack(s)? Maybe that sporty 30 liter pack that will finally make butt-shots look bold and alpine doesn’t have all the features needed, and leaves you wishing you could piece together parts from different packs to make one exactly to your taste.
A custom built backpack could solve the goldilocks issue of getting all the features you want on a pack, but can be cost prohibitive to a lot of people. So, in the interest of saving your hard earned dollars to buy more climbing gear, I propose in this article some crafty and creative ideas to add features to your already existing packs. Maybe your fleet of bags looks different than mine so this won’t be a step-by-step, but the ideas here will get some thoughts going in your head to make that pack of yours more useful and add your own personality to show off.
Hipbelt
One of my big pet peeves with backpacks is their hip belts and how uncomfortable they can be. Yeah, yeah, I know that my mini 20-something-liter daypack needs a micro strand of webbing so that it’s out of the way while on route, but I’ll be darned if that thing doesn’t dig in on long approaches when I have it loaded up with gear. After one too many hikes out with that thing girdling your waist, it might be time to consider a different hip belt.
While unfortunately not every backpack will have the option to remove the hipbelt and attach a new one, the feature is becoming more popular, especially among bags specific to climbing. One common hip belt setup for small bags is to have its thin webbing belt (generally ¾” width material) girth hitched onto the pack at two attachment points near the base of the frame. This method is great, as a simple undoing of the girth hitch allows you to remove the ¾” belt, and hitch on a new one of a larger size. If you can find them, 1.5” webbing belts are amazing to use and a surprising step up in comfort even without padding of any sort, and one of my favorites to girth hitch on to mini packs. If you can’t find a simple webbing belt like this, you can purchase a buckle and webbing from most local gear stores, and with some very basic stitching make the loops on the back required for girth hitch attachment.

Other packs might use some sort of plastic link, loop, or carabiner to attach the hip belt through a tighter, vertically aligned loop at the base of the frame. If you happen to find yourself with a pack like this, it is a bit easier to find hip belts for sale online that can accommodate this attachment style. I have had personal luck with some cheap, plushy, and comfortable hip belt options sold by “tacticool” websites. Whatever style you have, just make sure you don’t settle for the kidney damage you are likely inflicting with the brand belt that is supposedly all you need; don’t be afraid to comfort up!
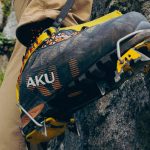
Straps
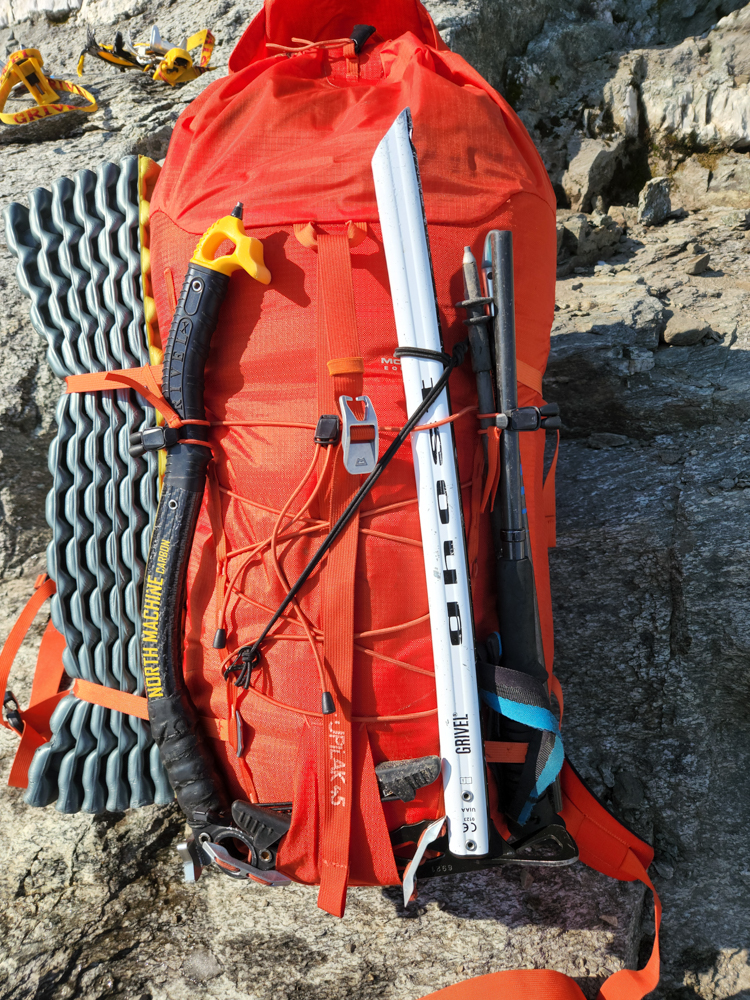
With a comfy hip belt on your pack, you will now need ways to push its weight and volume even further so that you can bring that extra warm layer or summit beer. This is where external straps come in. While some packs provide ample options to strap gear on the outside, I am sure one or two bags that you have look at others with jealousy. Thankfully, with some creativity, even the smallest of packs with only a few attachment points can easily be upgraded so you can carry more than your share of the weight.
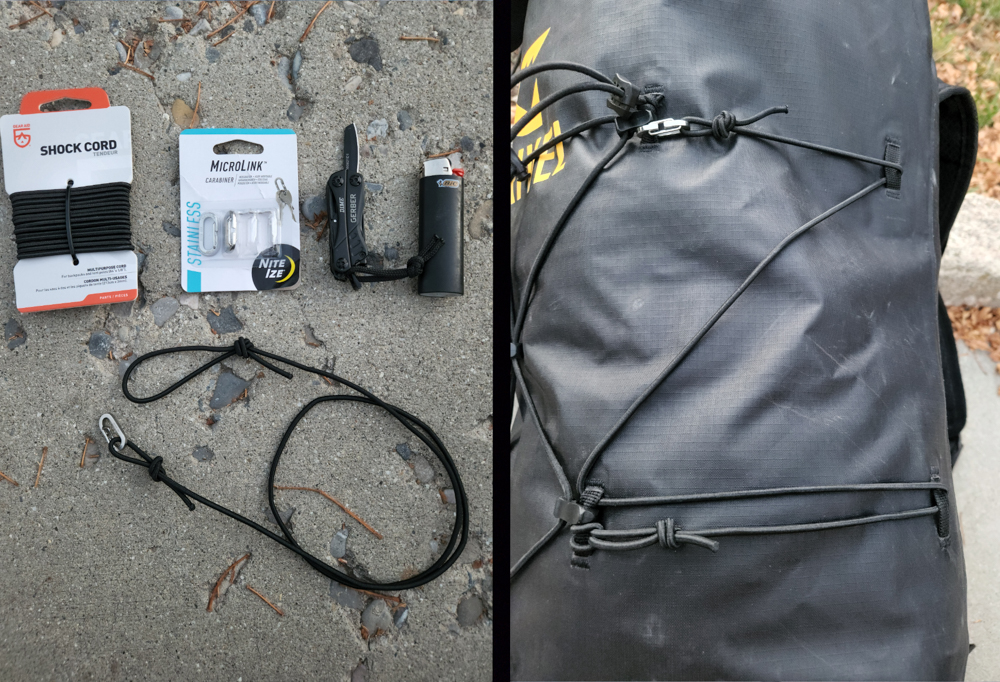
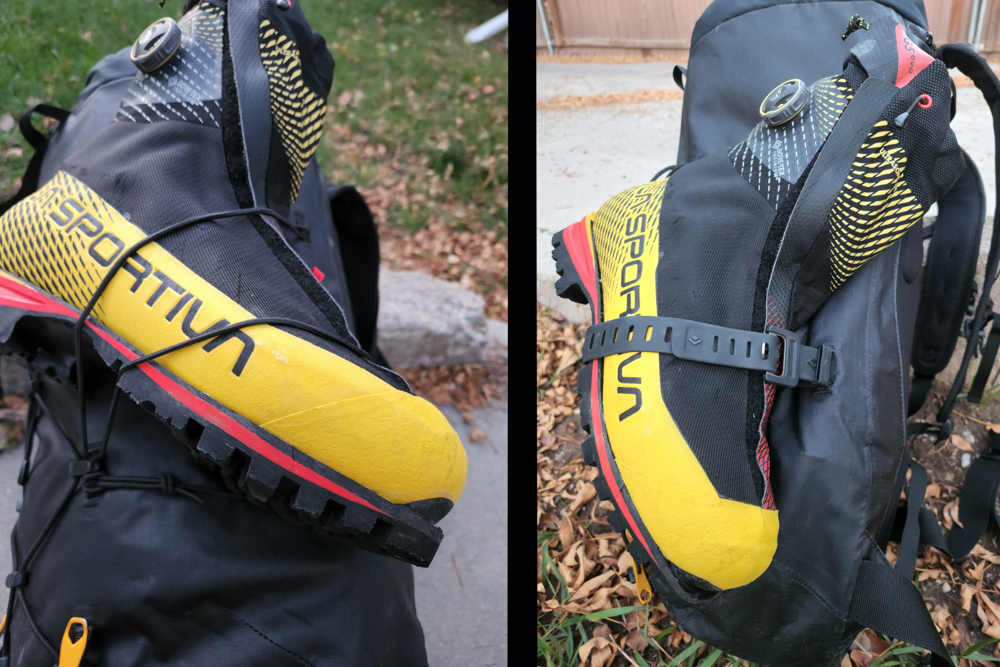
My methodology of choice for this practice centers around the humble shock-cord. You know, that stretchy stuff you can find on jacket cinches and can purchase by the foot from your local gear store for dirt cheap? Well, with some clever zig-zagging around your pack you can create side straps that hold foam pads and pickets, or a front panel grid for things like wet crampons or extra jackets. I won’t go into too much detail about how to best do this, as it is pretty specific to the pack you are working with, but I normally start with a loop in the cord girth hitched on to a point, and then start looping it through any place I can find; it’s all fair game. For added bonus you can make the system removable with a mini-carabiner on one end and a girth hitch on the other, or you can add in cord-lock devices to make the tension adjustable. Whatever way you go about it, hopefully this plants the idea in your mind that you can add in some extra attachment options to your pack for very cheap.
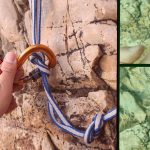
Helmet Carry
And speaking of planting ideas, if there is one simple inspiration you take away from this blog I hope it is my signature helmet carry apparatus (patent pending). We’ve all seen the horror of someone’s helmet smacking their way up the trail as it was loosely clipped to the side of their pack. And with our alternatives often being a cumbersome net that clips on our pack or sticking the darn thing inside and taking up heaps of room, one is often left wanting alternatives. Well fear not, a cheaper and more versatile option does exist!
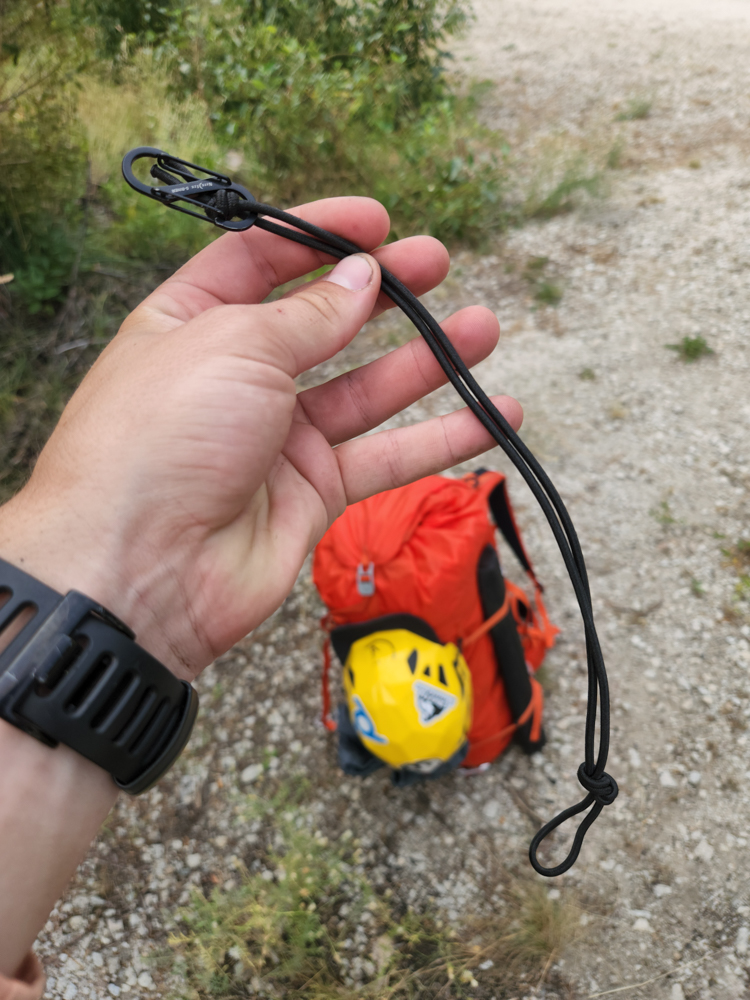

Simply tie a loop of shock cord together, and then tie a second knot a short distance from the end of that loop. With a mini carabiner added on, you have yourself the most minimal helmet attachment system that is incredibly quick to stash away, works with nearly every helmet, and has more versatility than some dumb net. Just pass the shock cord through any two vents on your helmet, and with one side girth hitched and the other clipped to your pack you have a simple carry system. I have loved using this system to get my helmet on my pack as its versatility allows me to put the helmet in multiple locations, the front or top of pack, and it still works when other items clutter the outside of your pack.
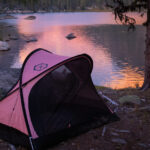
Shoulder Straps
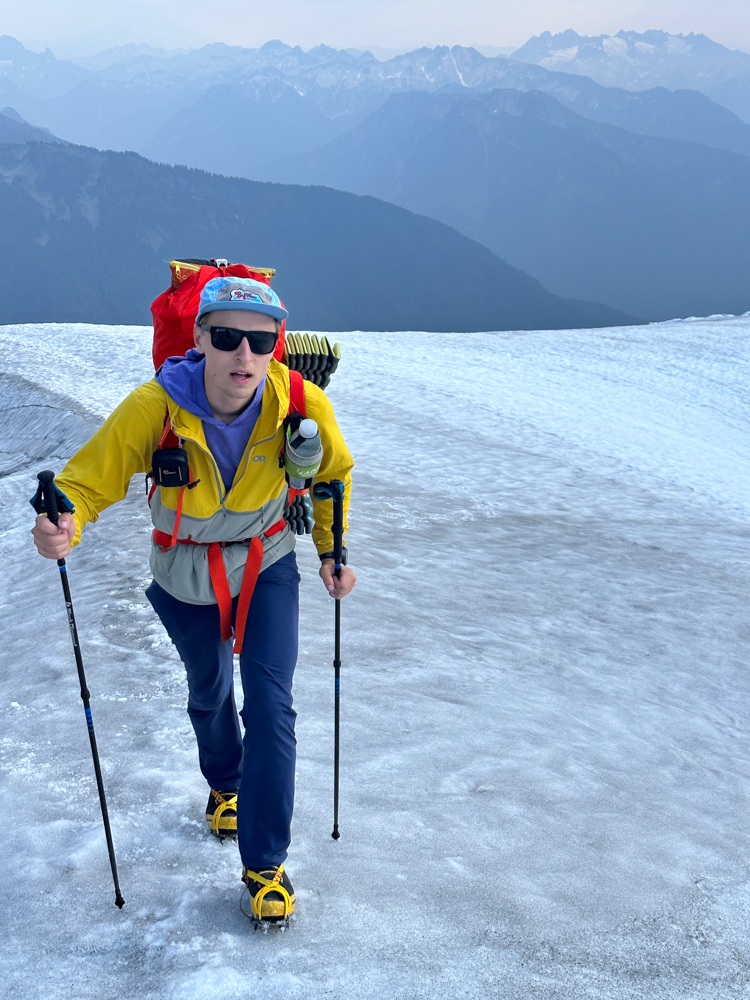
Getting weight outside of my pack and utilizing other attachment points helps increase what we can carry, but it can also help add convenience to what we carry. Using all of that empty space on your shoulder straps is a great way to get often used items out of your pack and into a secure and accessible position. My go-to approach for this is to have a water bottle carrier on one shoulder strap for the entirety of the summer months. When the sun is beating down and there is no danger of water freezing, it can be incredibly convenient to take smaller, more frequent swigs of water from your shoulder strap instead of bucking the pack off your back every time you need to drink. Several brands make great bottle carry options, with my favorite being the Camp Bottle Holder since it is cheap, easy to remove, and works great.
After water, it might be nice to add an aftermarket pocket to your shoulder strap for stashing your phone or extra snacks. Or maybe you can clip your camera there with a Peak Designs mount. However you go about it, don’t neglect this open real estate on your pack!
Repair
The final bit of pack wizardry we are going to get into is another that might seem terribly obvious, but can often be overlooked. Our packs inevitably get worn down through use. Every time you strap sharp skis to the side of your pack, squeeze through a tight chimney with it, or just throw it down in the parking lot at the end of a long hike, the material on your pack will feel that. Little tears in the fabric will easily propagate into large holes, even with modern ripstop fabrics, so my advice is to be familiar with and have the materials to patch up your poor old pack.
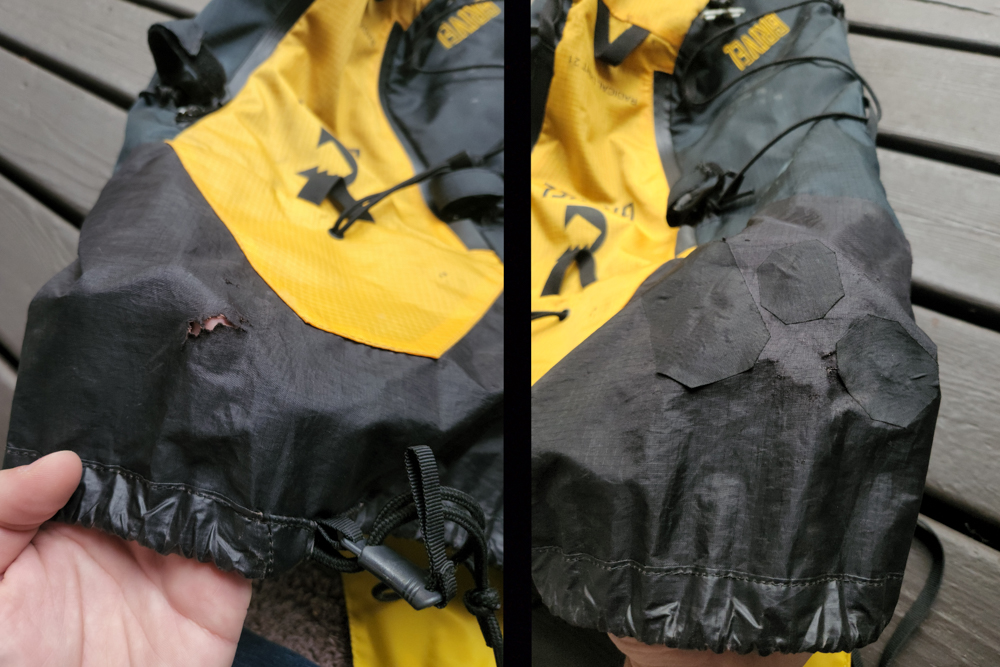
There are many options on the market for easy fabric repair, but my go to is having a roll of Tenacious Tape on hand to cover up any tears. Sure, you don’t have to be a full psycho like me and carry the stuff around on every outing, but patching up those small holes as soon as you get home is a great habit to prevent further degradation. Just make sure to trim the corners off any square shapes when taping, as rounded edges are much less likely to peel up over time. I have even been known to pre-emptively tape areas of my packs that I know will see high wear, just to add an extra layer of material to abrade instead of the one I paid much more for. A cousin of Tenacious Tape, NoSo patches are another easy option that you can keep on hand should a tear occur, and they often come with fun designs. Heck, I’ve slapped a NoSo patch on to a brand new backpack before as an aesthetic piece, just to tag on the logo of one of my favorite brands.
The Final Word
Whatever your pack or preferences, I hope this little blog helped give you some ideas. I’m certainly not coming up with any groundbreaking ideas, but the inspiration just might help give you the nudge you need. Maybe it gets you that extra feature you always wanted to help pack more on. Maybe it gives you the direction you need to help take care of and extend the life of your pack, keeping it out of the landfill for just that little bit longer. Or maybe these ideas just help you to add that extra bit of personality to your gear so that your friends who haven’t read this say, “wow, what a cool feature you’ve added to totally make that pack unique!” However you go about it, don’t just settle with what the brands give you, get some materials and experiment with what works for you.

About the Gear Tester

Evan Watts
Evan grew up in the small hometown of Boring, Oregon, where he cut his teeth hiking and backpacking in the local Cascades. He now enjoys ice climbing, backcountry skiing, and trail running around in the Western States, and manages to fight off permanent employment despite an environmental engineering degree and perturbed parents.
- Evan Watts
- Evan Watts

- Evan Watts

- Evan Watts

- Evan Watts

- Evan Watts

- Evan Watts

- Evan Watts
- Evan Watts
- Evan Watts
- Evan Watts
- Evan Watts

- Evan Watts

- Evan Watts
- Evan Watts

- Evan Watts
- Evan Watts
- Evan Watts